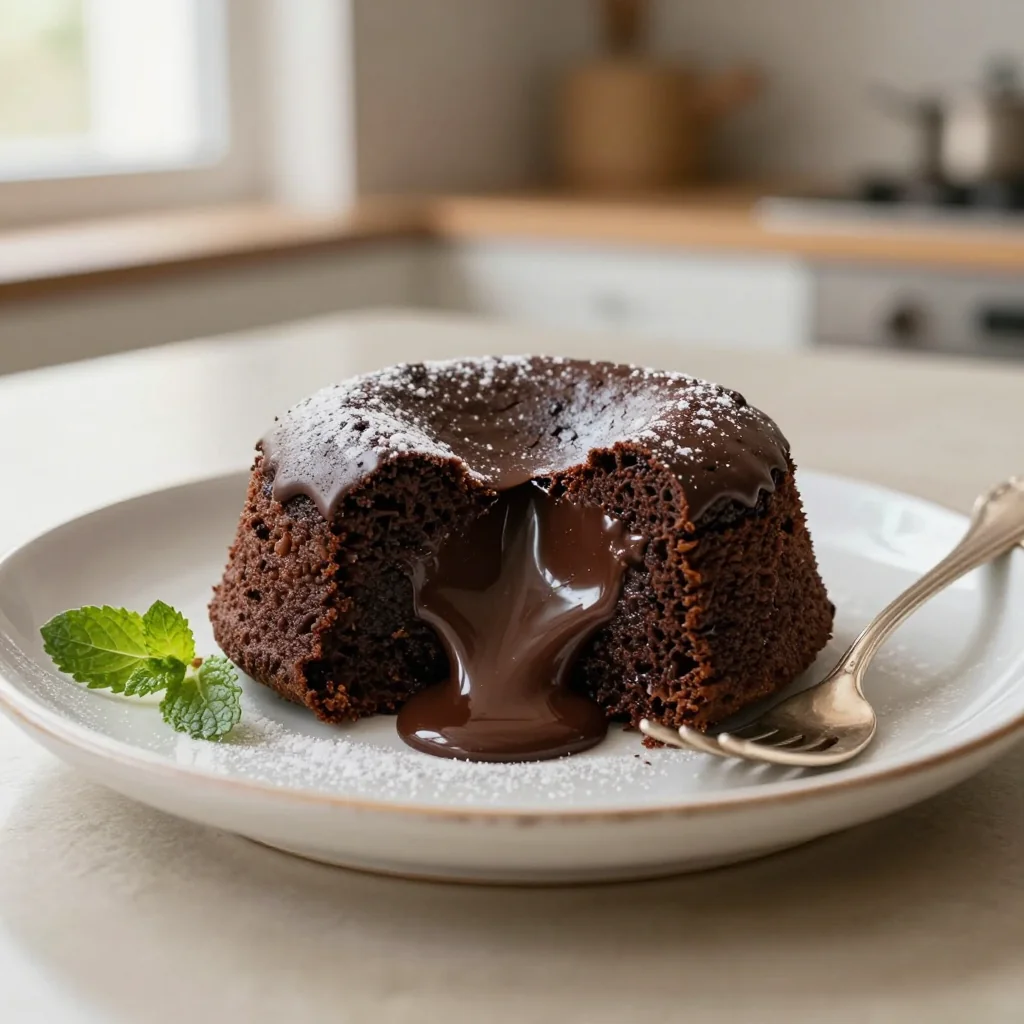
A silky, molten‑heart chocolate cake that oozes pure indulgence with every bite.
There’s a particular kind of magic that happens when a perfectly baked chocolate cake meets a liquid, glossy core. I first experienced that enchantment on a rainy evening in Paris, when a tiny patisserie tucked away on Rue Montorgueil served me a single‑serve chocolate marvel that burst open like a volcanic eruption of cocoa. The steam rose, the aroma of dark chocolate filled the air, and the first spoonful was a silky river of molten bliss that melted my worries away.
This lava cake hails from the classic French “fondant au chocolat,” a dessert that has traveled from haute cuisine tables to home kitchens worldwide. Its allure lies in the contrast between a crisp, cake‑like exterior and a luxuriously fluid interior—a paradox that makes every bite feel both familiar and surprising.
In this article, I’ll walk you through every nuance of creating that perfect molten center, from selecting the right chocolate to mastering the timing that guarantees a runny heart. You’ll learn why a brief rest after baking is essential, how to avoid a dry crumb, and the science behind the perfect ratio of butter to chocolate.
Ready to impress your guests—or simply treat yourself to a moment of pure chocolate ecstasy? Let’s dive in and make this Lava Cake Chocolate Molten Center a centerpiece of your dessert repertoire.
🌟 Why This Recipe Will Captivate You
Every bite of this lava cake delivers a theatrical experience, a blend of textures and flavors that feels both elegant and comfortingly indulgent.
- ✨ Irresistible Texture Contrast: A delicate crust gives way to a flowing, glossy chocolate core, creating a sensory surprise that keeps diners coming back for more.
- ✨ Simple Ingredient List: With just eight core ingredients, you won’t need a pantry full of exotic items—just good quality dark chocolate and butter.
- ✨ Quick Turnaround: From start to finish it takes under 35 minutes, making it perfect for last‑minute dinner parties.
- ✨ Scalable Portion Control: The built‑in portion adjuster lets you easily double or halve the recipe without compromising the molten center.
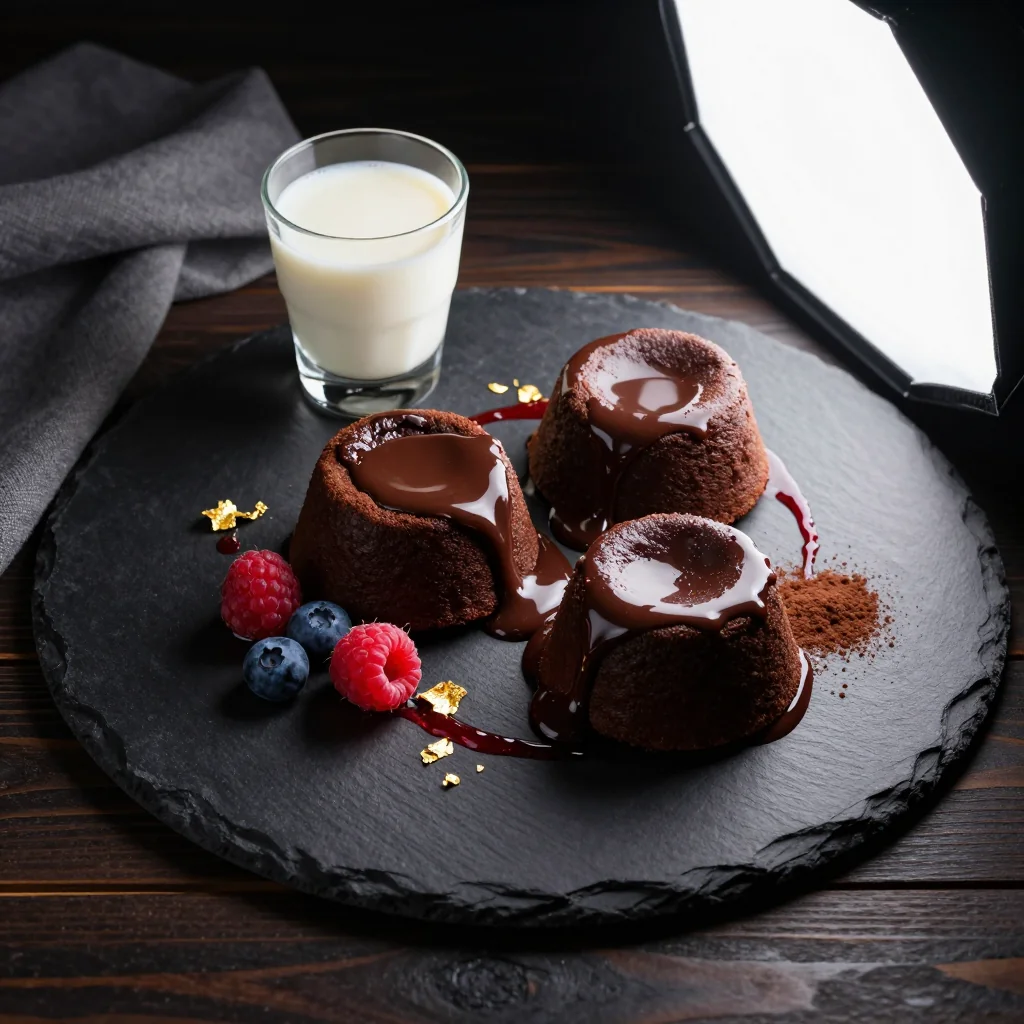
- ✨ Versatile Presentation: Serve it solo, with a dusting of cocoa, a scoop of vanilla ice cream, or fresh berries for a pop of color.
- ✨ Science‑Backed Success: Precise temperature control and resting time ensure the center stays fluid while the outer cake sets, eliminating guesswork.
🥗 Ingredients
📝 Complete Ingredient List
For the Cake Batter:
For the Molten Center:
For Garnish:
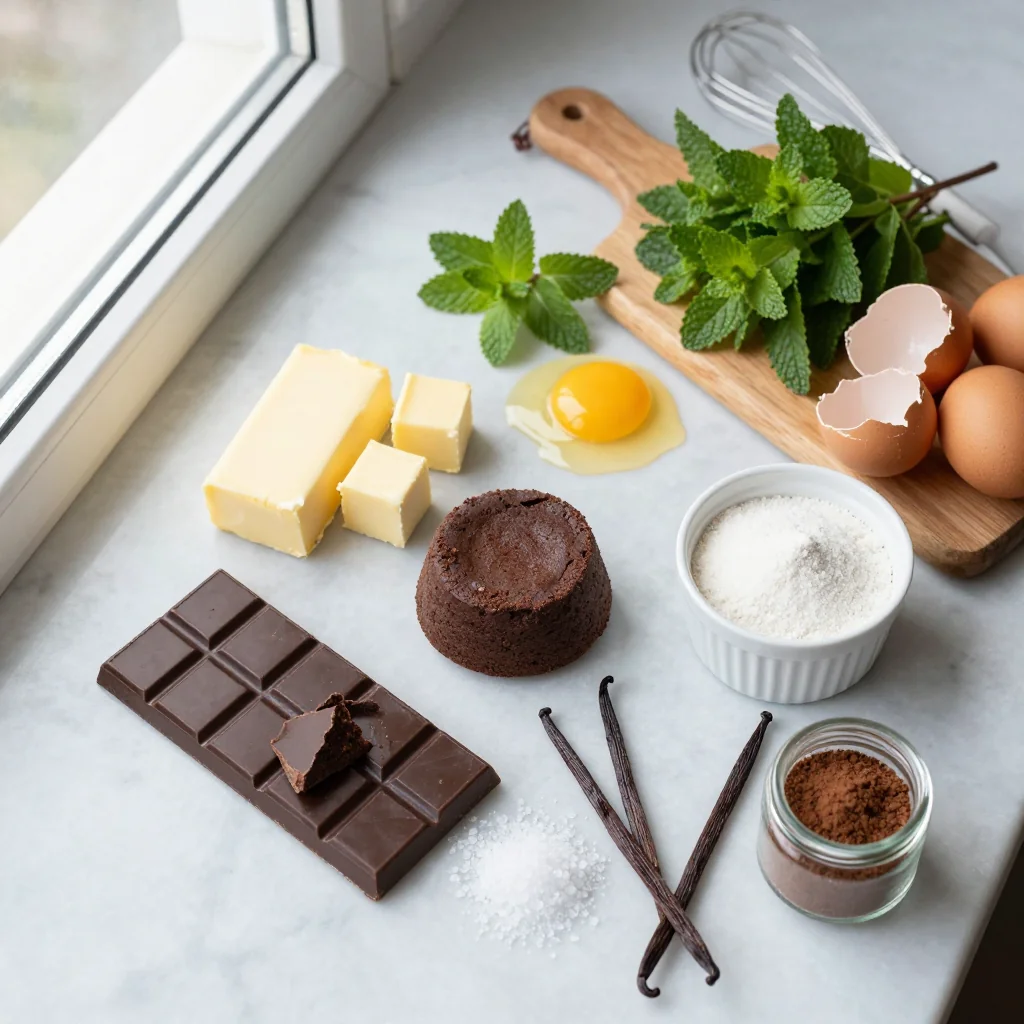
🔍 Focus on Key Ingredients
Dark Chocolate (70% Cocoa)
The backbone of this recipe, dark chocolate provides the deep, bittersweet flavor that defines a true lava cake. Look for chocolate with at least 70% cocoa solids; this ensures a firm set around the molten core while still delivering a glossy finish. If you prefer a slightly sweeter profile, you can opt for 60% cocoa, but be aware the center may become less fluid.
Unsalted Butter
Butter contributes richness and moisture. Using unsalted butter lets you control the salt level precisely. European‑style butter, with its higher butterfat content, yields a silkier texture and a more stable batter that holds the molten heart.
Eggs and Egg Yolks
Eggs act as a leavening agent and add structure, while extra yolks increase the custardy richness. The balance of whole eggs and yolks is crucial: too many whites can dry the cake, whereas too many yolks can make the batter overly dense.
🔄 Quick Substitutions
| If you don’t have... | Use instead... |
|---|---|
| Dark chocolate (70%) | Bittersweet chocolate (60‑70%) |
| Unsalted butter | Salted butter (reduce added salt) |
| All‑purpose flour | Gluten‑free flour blend (1:1) |
👨🍳 Step‑by‑Step Instructions
Follow these detailed steps to achieve a perfectly crisp exterior and a luxuriously runny interior. Preparation is key, so take your time to measure precisely and pre‑heat your oven correctly.
📋 Phase 1: Preparation & Mise en Place
Gather and measure all ingredients before you start melting chocolate.
Pre‑heat the Oven and Prepare Ramekins
Set your oven to 200°C (392°F). Generously butter four 6‑ounce ramekins, then dust each with a light coating of cocoa powder, tapping out any excess. This ensures the cakes release cleanly after baking.
Melt Chocolate and Butter for the Batter
Place 200 g dark chocolate and 100 g butter in a heat‑proof bowl over a pot of simmering water (bain‑marie). Stir gently until completely smooth, then remove from heat and let cool slightly—about 2 minutes—to avoid cooking the eggs later.
🔥 Phase 2: Baking & Assembly
Combine, fill, and bake the cakes to achieve that coveted molten center.
Whisk Eggs, Yolks, Sugar, and Vanilla
In a separate bowl, whisk together the 4 large eggs, 4 yolks, 150 g sugar, and 5 ml vanilla extract until the mixture lightens in color and becomes slightly frothy—about 2 minutes. This incorporation of air helps the cake rise.
Combine Chocolate with Egg Mixture
Gradually pour the cooled chocolate‑butter blend into the egg mixture while whisking constantly. The gradual combination prevents the eggs from curdling and creates a homogeneous batter.
Fold in Flour, Salt, and Molten Center
Sift 50 g flour and 0.25 tsp salt over the batter. Gently fold with a rubber spatula until just incorporated—over‑mixing will develop gluten and make the cake tough. Then, spoon the 50 g chocolate‑butter mixture for the molten core into the center of each ramekin, ensuring it’s fully enveloped by batter.
✨ Phase 3: Finishing & Serving
Finalize the bake, test for doneness, and plate beautifully.
Bake the Cakes
Place the ramekins on a baking sheet and bake for 12 minutes. The edges should be set and slightly puffed, while the center remains wobbly. Resist the urge to open the oven early; a steady temperature ensures the molten core stays liquid.
Rest Briefly
Remove the ramekins and let them rest for 1 minute. This short rest allows the interior to settle just enough to hold its shape when unmolded, yet remains fluid.
Unmold and Garnish
Run a thin knife around the edge of each ramekin, then invert onto a dessert plate. Dust lightly with cocoa powder and add a scoop of vanilla ice cream if desired. The contrast of hot chocolate lava with cold ice cream is spectacular.
💡 Expert Tips & Tricks
🛒 Choosing the Best Ingredients
Opt for chocolate that lists cocoa solids as the first ingredient; avoid compounds or fillers. When buying butter, look for a butterfat content of at least 82% for a richer mouthfeel. Fresh, free‑range eggs provide superior flavor and better emulsification, which contributes to a smoother batter.
🔪 Preparation Techniques
Before melting chocolate, chop it into uniform pieces; this speeds up melting and reduces the risk of scorching. When whisking the egg‑sugar mixture, use a balloon whisk and a slightly angled bowl to incorporate air efficiently. Finally, fold the flour in a gentle “cut‑and‑turn” motion to keep the batter light.
🌡️ Mastering the Cooking Process
Invest in an oven thermometer; many home ovens run hotter than the dial indicates, which can cause the center to set too quickly. Aim for a consistent 200°C (392°F). Also, use the middle rack to ensure even heat distribution. If you prefer a slightly firmer exterior, add an extra minute, but watch closely.
🍽️ Presentation & Service
Serve the cake immediately after unmolding for maximum molten flow. Pair with a dollop of whipped cream, a drizzle of raspberry coulis, or a sprinkling of toasted almond slivers for texture contrast. A crisp, unsweetened white wine or a glass of chilled port heightens the chocolate richness.
🏆 Pro‑Level Secrets
Even seasoned chefs fine‑tune details to elevate a good lava cake to an unforgettable experience.
- 🎯 Temperature Shock Technique: After baking, briefly place the ramekin on a chilled metal tray for 10 seconds. The sudden temperature drop creates a tighter crust while preserving the molten interior.
- 🎯 Double‑Layered Center: Combine 30 g dark chocolate with 20 g caramel sauce for the core. The caramel melts into the chocolate, adding a buttery sweetness that surprises the palate.
- 🎯 Use of a Silicone Mold: Silicone ramekins release the cake effortlessly, reducing the risk of breaking the delicate crust during unmolding.
- 🎯 Precise Portion Scaling: The built‑in portion adjuster recalculates all ingredient quantities in real time, ensuring consistent results whether you bake for 2 or 12 guests.
- 🎯 Resting the Batter: Let the batter sit for 5 minutes before filling the ramekins. This allows the flour to hydrate fully, resulting in a smoother texture.
- 🎯 Finish with Sea Salt Flakes: A light sprinkle of flaky sea salt just before serving intensifies the chocolate flavor and adds a sophisticated crunch.
“Chocolate is a perfect food, a perfect ingredient, a perfect gift, and a perfect love.” — James Beard
🔄 Variations & Adaptations
The beauty of this lava cake lies in its flexibility. Whether you’re catering to dietary needs or craving a flavor twist, these adaptations keep the core experience intact.
🥬 Vegetarian / Vegan Version
Replace butter with a 1:1 ratio of coconut oil and use a plant‑based dark chocolate (ensure it contains no dairy). Substitute eggs with 4 tablespoons of aquafaba (chickpea liquid) whipped to soft peaks, and add 1 tbsp of cornstarch for structure.
- Vegan butter alternative (coconut oil) – provides similar melt and richness.
- Aquafaba – mimics egg whites, creating lift without animal products.
🌶️ Flavor Variations
Explore global twists by adjusting the core or the garnish. Each variation adds a new aromatic dimension while preserving the molten texture.
Spicy Mexican Version:
Stir ¼ tsp of cayenne pepper into the molten center and serve with a drizzle of cinnamon‑spiced chocolate sauce.
Mediterranean Version:
Mix 1 tbsp of finely chopped pistachios into the batter and garnish with a sprinkle of orange zest for a bright, nutty contrast.
Asian Matcha Version:
Add 1 tsp of high‑grade matcha powder to the batter and serve with a side of sweet red bean paste for an East‑Asian flavor profile.
⚠️ Dietary Adaptations
Gluten‑Free:
Swap all‑purpose flour for a 1:1 gluten‑free flour blend. Ensure the blend contains xanthan gum to mimic the elasticity of wheat.
Lactose‑Free:
Use dark chocolate that is dairy‑free and replace butter with a lactose‑free margarine or coconut oil.
Low‑Calorie:
Reduce sugar to 100 g and use a sugar substitute like erythritol. Replace half the butter with unsweetened applesauce for moisture without extra calories.
👶 Kid‑Friendly Version
For younger palates, decrease the cocoa intensity by using 55% dark chocolate and add a swirl of strawberry jam into the molten center. Serve with a small scoop of vanilla frozen yogurt instead of ice cream.
📦 Storage & Reheating
🧊 Conservation
Refrigerator:
- Duration: 3 days
- Container: Airtight glass jars or sealed plastic containers.
- Tip: Keep the cakes in their ramekins, covered with plastic wrap to prevent drying.
Freezer:
- Duration: 2 months
- Method: Wrap each ramekin tightly in foil, then place in a freezer‑safe bag.
- Defrosting: Transfer to the refrigerator overnight, then bring to room temperature for 30 minutes before reheating.
💡 For best texture, reheat rather than serve cold; the molten core re‑forms when gently warmed.
♨️ Reheating
🔥 Oven (Recommended):
- Preheat to 150°C (300°F).
- Cover each ramekin loosely with aluminum foil.
- Heat for 8‑10 minutes.
- Remove foil and continue for 2‑3 minutes to crisp the top.
⚡ Microwave (Quick):
- Place cake on a microwave‑safe plate.
- Heat on medium power for 30 seconds.
- Check consistency; add 10‑second bursts if needed.
🍳 Stovetop:
Place the ramekin in a skillet with a splash of water, cover, and heat over low flame for 5 minutes. This gentle steam method prevents the outer crust from over‑drying.
🍷 Perfect Pairings
🥗 Side Accompaniments
- Fresh Berries: A handful of raspberries or strawberries adds acidity that cuts through the richness.
- Toasted Almond Slivers: Provide a subtle crunch and nutty aroma.
- Whipped Cream: Lightly sweetened cream balances the intense chocolate flavor.
🍷 Wine & Beverage Pairings
- Ruby Port: Its deep fruit notes echo the chocolate while adding a velvety finish.
- Late Harvest Zinfandel: Sweetness and spice complement the molten center.
- Non‑Alcoholic: Sparkling pomegranate juice offers bright acidity and visual contrast.
🍰 Complementary Courses
Start the meal with a light citrus salad to awaken the palate, follow the lava cake with a cheese plate featuring blue cheese and honey, and finish with a simple espresso to cleanse the palate.
❓ Frequently Asked Questions
Q: How do I know when the lava cake is perfectly baked?
Look for a set outer edge that springs back slightly when touched, while the center should still jiggle gently. If you insert a thin skewer into the side, it should come out clean of batter but still leave a small indentation in the middle.
Q: Can I use a different size of ramekin?
Yes, but you’ll need to adjust the baking time. Smaller ramekins (4‑ounce) bake in about 9‑10 minutes, while larger 8‑ounce ones may need 14‑15 minutes. Keep a close eye on the edges; the goal is a firm perimeter with a liquid center.
Q: What if my chocolate center solidifies?
Ensure the chocolate‑butter mixture for the core is fully melted and slightly cooled before adding to the batter. Over‑baking also causes solidification, so stick to the recommended time and temperature.
Q: Is it possible to make this recipe gluten‑free?
Absolutely. Substitute the all‑purpose flour with a 1:1 gluten‑free blend that contains xanthan gum. The texture remains tender, and the molten core stays fluid.
Q: Can I prepare the batter ahead of time?
Yes, you can whisk the batter and keep it refrigerated for up to 12 hours. Bring it to room temperature before filling the ramekins, and add the molten center just before baking.
Q: How do I store leftovers without losing the lava effect?
Cool the cakes completely, then refrigerate in sealed containers. Reheat gently using the oven method described above to restore the molten flow.
🎉 Let’s Get Baking!
This Lava Cake Chocolate Molten Center brings together the elegance of French pâtisserie and the comfort of a home‑cooked dessert. With its simple ingredient list, precise yet forgiving technique, and the built‑in portion adjuster, you can serve a crowd or enjoy an intimate treat without any guesswork. The combination of a crisp exterior, a silky molten heart, and the optional garnish of ice cream or berries makes every serving a celebration.
Give it a try, experiment with the variations, and don’t forget to share your results. Your feedback helps the community grow, and your photos might inspire the next chocolate lover who stumbles upon this page.
Have you tried this recipe?
Leave a comment and rating below! Share your photos on Instagram with #LavaCakeLove for a chance to be featured.
Lava Cake Chocolate Molten Center
A silky chocolate cake that erupts with a molten heart.
📝 Ingredients
Cake Batter
Molten Center
Garnish
👨🍳 Instructions
- 1 Pre‑heat oven to 200°C (392°F) and butter four 6‑ounce ramekins, dusting with cocoa powder.
- 2 Melt 200 g chocolate and 100 g butter over simmering water; let cool slightly.
- 3 Whisk 4 eggs, 4 yolks, 150 g sugar, and vanilla until light and frothy.
- 4 Combine the melted chocolate mixture into the egg mixture, stirring gently.
- 5 Fold in sifted flour and salt, then spoon the molten‑center chocolate‑butter blend into the center of each ramekin.
- 6 Bake for 12 minutes; edges should be set while the center wobbles.
- 7 Rest for 1 minute, then run a knife around the edge and invert onto plates.
- 8 Dust with cocoa powder, add a scoop of vanilla ice cream, and serve immediately.
- 9 Optional: drizzle a raspberry coulis or sprinkle toasted almond slivers for extra texture.
- 10 Enjoy the molten chocolate flow and share your experience with friends!
🥗 Nutrition (per serving)
*Values are estimates based on standard ingredient data.
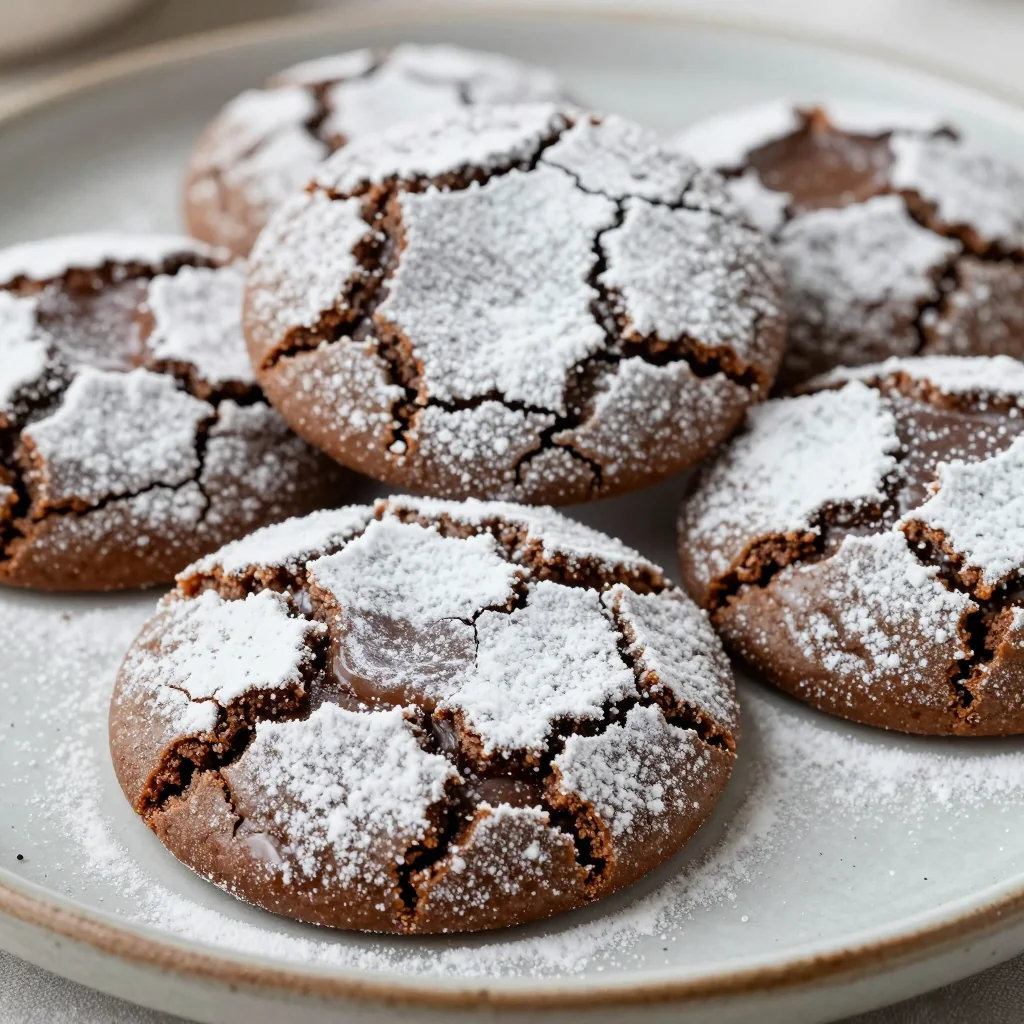
📚 You Might Also Like
Classic Chocolate Mousse
Vanilla Crème Brûlée
Traditional Tiramisu


💬 Comments & Reviews
Leave a Comment
Comments will appear here once readers share their thoughts.