Picture this: I’m in my kitchen at 2 a.m., half‑asleep, and the pantry looks like a crime scene—empty cereal boxes, a lone bag of protein powder, and a stubborn craving for something that feels like a decadent dessert but won’t sabotage my macros. I grabbed a red food‑coloring gel, tossed in a few scoops of vanilla protein, and tried to mash together whatever was on hand. The result? A dense, bland slab that tasted like a gym‑bag’s worst nightmare. I dared myself to keep tweaking, and after a marathon of taste‑tests (including one where I ate an entire batch before anyone else could even sniff it), I finally nailed the formula that makes my taste buds do a happy dance.
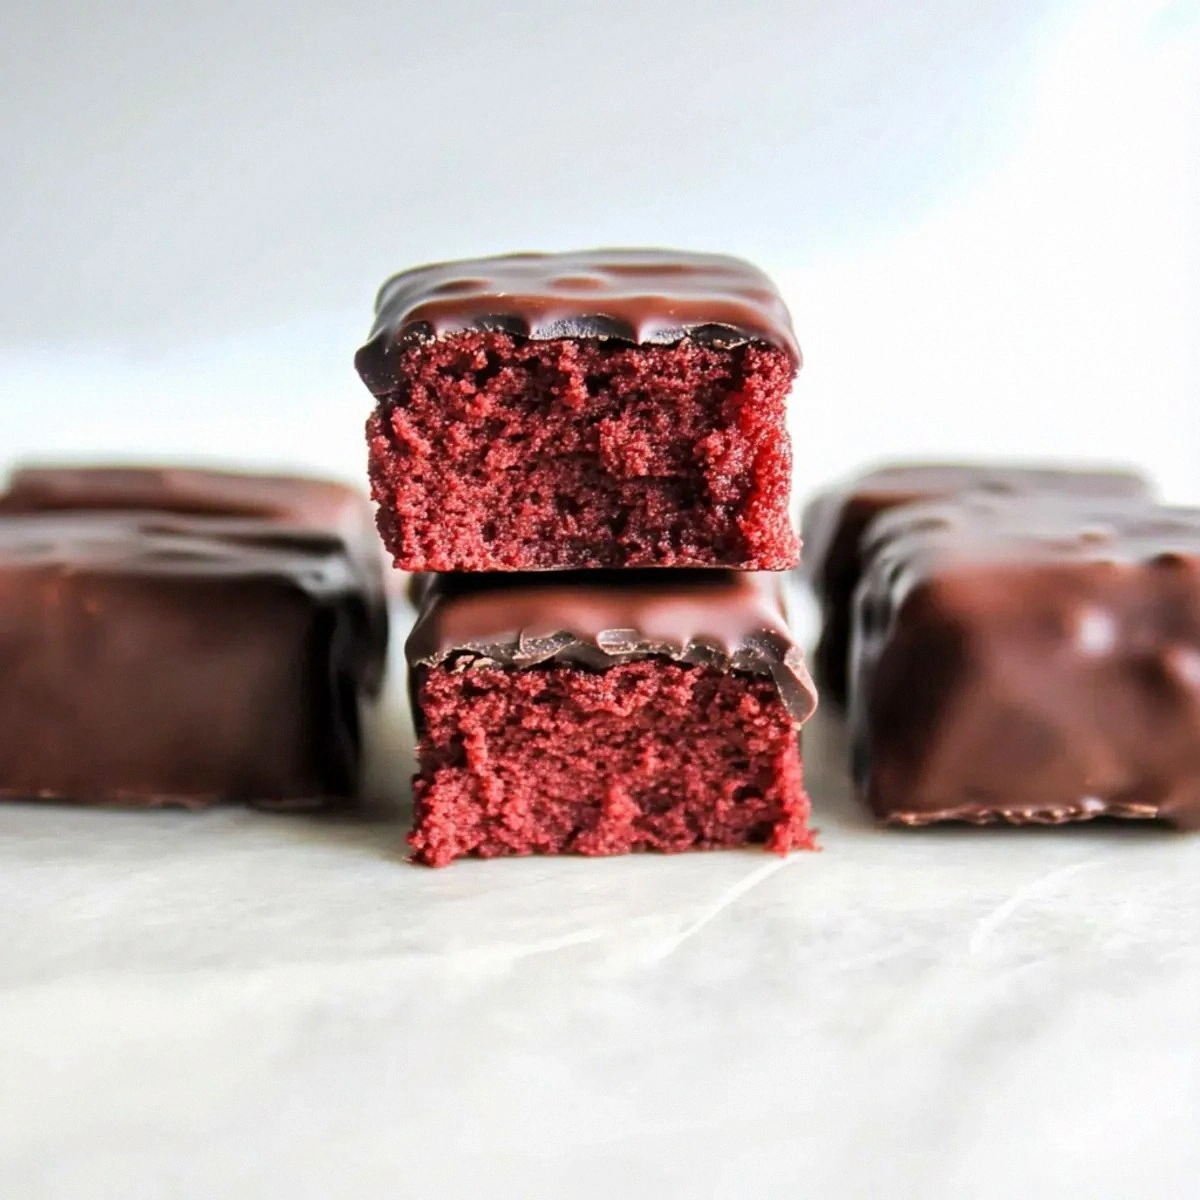
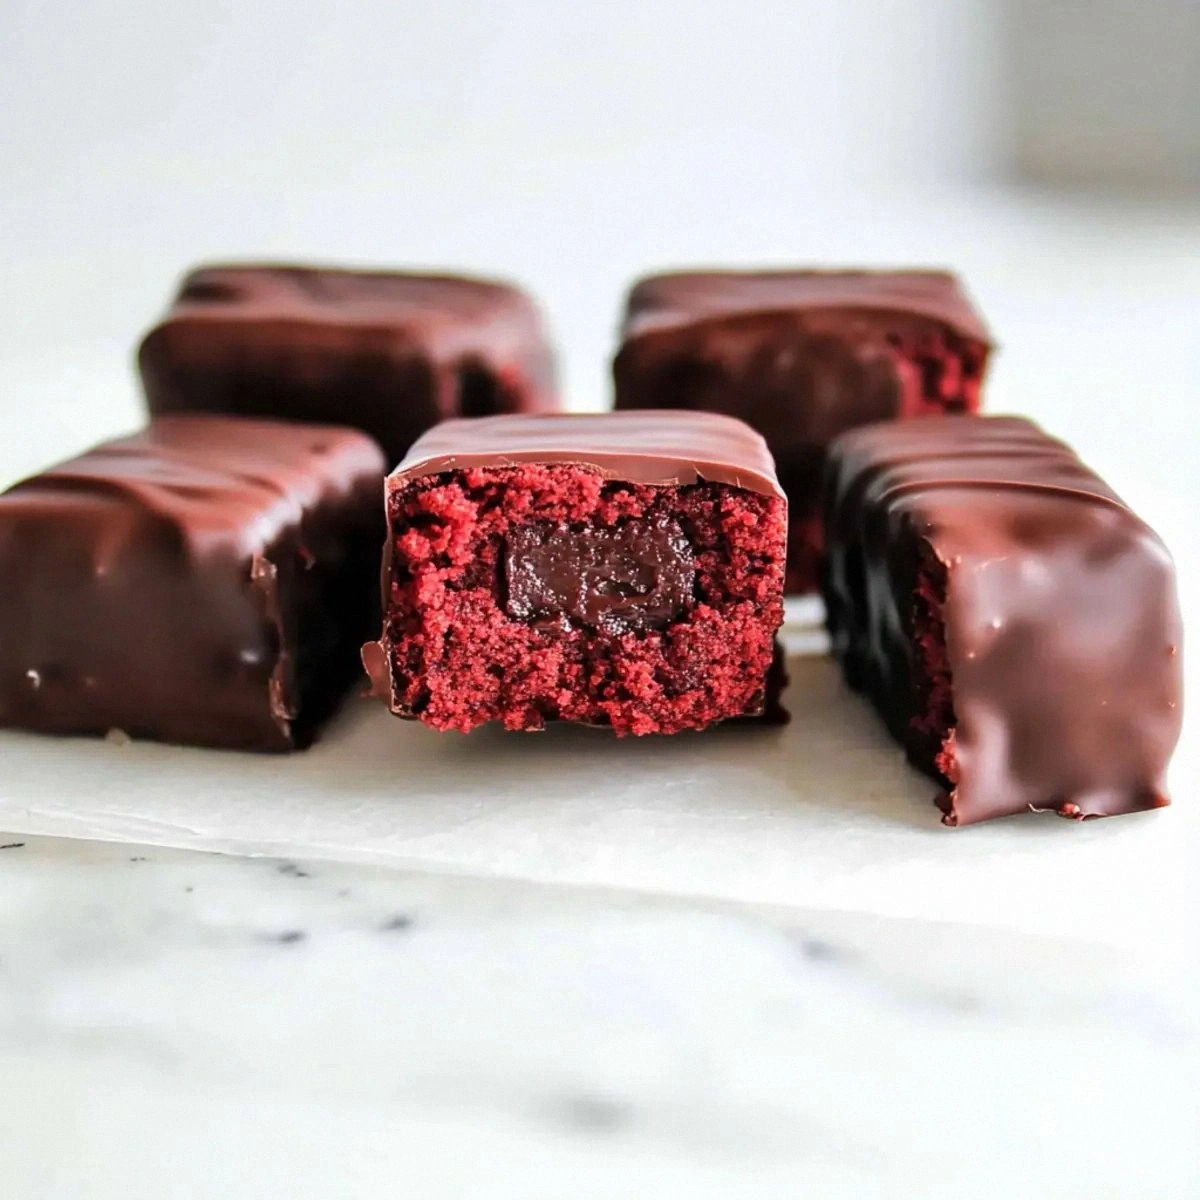
The moment you open the oven door, the aroma hits you like a warm hug from an old friend—sweet cocoa mingles with a faint, buttery whisper from the cream cheese, and that unmistakable hint of red velvet whispers promises of indulgence. The bars themselves are a study in contrast: a soft, cake‑like crumb that yields to the bite, while the white chocolate chips melt into pockets of creamy sweetness that linger on the palate. You’ll hear a faint sigh as you pull the pan away, the edges pulling just enough to reveal that perfect, slightly glossy top. The texture is as smooth as satin and as satisfying as a post‑workout protein shake, but without the chalky aftertaste you’ve probably endured before.
What makes this version truly stand out is that it doesn’t compromise on any front—gluten‑free, high‑protein, and still a show‑stopper that could rival any bakery’s red‑velvet masterpiece. Most recipes either sacrifice protein for flavor or end up with a dry, crumbly mess that feels more like a health food experiment than a treat. I’ve cracked the code by balancing the moisture from cream cheese, the lift from coconut flour, and the sweet‑spot sweetener that keeps the carbs low without sacrificing that classic velvet sweetness. And the secret weapon? A splash of almond milk that keeps everything moist, plus a touch of cocoa that deepens the color without turning it bitter.
Okay, ready for the game‑changer? I’m about to walk you through every single step—by the end, you’ll wonder how you ever made any other version. I dare you to taste this and not go back for seconds. Let’s dive in, and I’ll share the exact technique that turns a simple batter into a bar that practically glows with protein power.
What Makes This Version Stand Out
- Protein‑Packed: Each bar delivers a solid 25 g of protein, thanks to the vanilla protein powder and low‑fat cream cheese, making it perfect for post‑workout recovery or a midday pick‑me‑up.
- Gluten‑Free Glory: Coconut flour replaces traditional wheat flour, giving you a tender crumb without the gluten, ideal for those with sensitivities.
- Velvet Texture: The combination of cream cheese and almond milk creates a moist, cake‑like interior that doesn’t dry out after cooling.
- Low‑Sugar Sweetness: Monk fruit sweetener provides the perfect level of sweetness without spiking blood sugar, keeping carbs in check.
- Eye‑Catching Color: A single tablespoon of red food‑coloring gel yields that iconic red‑velvet hue without any artificial dyes.
- White Chocolate Bliss: The generous cup of white chocolate chips adds pockets of melt‑in‑your‑mouth decadence that contrast beautifully with the cocoa base.
- Easy Prep: With just one bowl and a 30‑minute bake, this recipe fits into even the busiest schedules.
- Make‑Ahead Magic: Store them in the fridge for up to a week, and they stay fresh, chewy, and ready to fuel your day.
Inside the Ingredient List
The Flavor Base
Vanilla Protein Powder (1 cup): This is the backbone of our bars, providing the bulk of the protein while adding a subtle vanilla sweetness that balances the cocoa. Skipping it would leave you with a low‑protein, flavor‑flat bar. If you’re allergic to dairy, a plant‑based vanilla isolate works just as well, but expect a slightly different texture.
Cocoa Powder (1/4 cup): The cocoa deepens the red‑velvet color and adds a rich chocolate undertone without overwhelming the delicate flavor. Using Dutch‑processed cocoa can make the bars a shade darker, while natural cocoa keeps the color bright and vibrant.
The Texture Crew
Coconut Flour (1/4 cup): This gluten‑free flour absorbs moisture like a sponge, giving the bars structure and a tender crumb. Too much coconut flour can make the batter too dry, so measure carefully. If you can’t find coconut flour, almond flour is a decent swap, though the texture will be a bit denser.
Low‑Fat Cream Cheese (8 oz): The cream cheese adds richness, moisture, and a subtle tang that cuts through the sweetness. It also contributes to the protein count. For a dairy‑free version, try a firm tofu blended with a splash of lemon juice.
The Unexpected Star
Monk Fruit Sweetener (1/4 cup): This zero‑calorie sweetener mimics sugar’s bulk without the carbs. It’s perfect for keeping the bars low‑glycemic. If you don’t have monk fruit, erythritol or a blend of stevia and erythritol works, but the texture may be slightly grainier.
Unsweetened Almond Milk (1/4 cup): A splash of almond milk keeps the batter from becoming too thick and ensures the bars stay moist after baking. Too much liquid will make them soggy, so stick to the measured amount. Oat milk can be used for a creamier mouthfeel.
The Final Flourish
Red Food Coloring Gel (1 tbsp): A little goes a long way; this gel gives an intense, uniform red without diluting the batter. If you prefer natural colors, beet powder can be used, but it will add an earthy flavor.
White Chocolate Chips (1 cup): These sweet bursts melt slightly during baking, creating pockets of creamy indulgence that contrast the cocoa base. For a nutty twist, swap half the chips for chopped toasted almonds.
Everything's prepped? Good. Let’s get into the real action…
The Method — Step by Step
Preheat your oven to 350°F (175°C) and line an 8×8‑inch baking pan with parchment paper, allowing some overhang for easy removal later. While the oven warms, whisk together the vanilla protein powder, coconut flour, cocoa powder, and monk fruit sweetener in a large mixing bowl. This dry mix should look uniformly brown, and you’ll notice a faint, pleasant aroma from the cocoa—this is your flavor foundation.
Kitchen Hack: Sift the dry ingredients together; this eliminates any lumps and ensures an even texture throughout the bars.In a separate bowl, beat the low‑fat cream cheese until smooth—about 2 minutes on medium speed. Add the almond milk and continue to blend until the mixture is glossy. Then, drizzle in the red food‑coloring gel and watch the batter transform into a deep, velvety crimson, like a sunrise over a chocolate river.
Combine the wet and dry mixtures, stirring gently until just incorporated. Over‑mixing can cause the bars to become dense, so stop once you see no more flour streaks. At this point, the batter should be thick but spreadable; if it feels too stiff, add a teaspoon of extra almond milk.
Fold in the white chocolate chips using a rubber spatula, ensuring they’re evenly distributed. This is the moment where pockets of creamy sweetness start to appear—think of tiny snowflakes falling into a red‑velvet sky.
Pour the batter into the prepared pan, spreading it with an offset spatula to achieve an even surface. Tap the pan gently on the counter three times; this releases any trapped air bubbles and helps the bars bake uniformly.
Slide the pan into the preheated oven and bake for 25‑30 minutes. The edges will begin to pull away from the parchment, and a faint crackle will form on the top—those are the signs of a perfectly baked bar. Watch Out: If the top starts to darken too quickly, loosely cover with foil to prevent over‑browning.
Watch Out: Opening the oven door before the 20‑minute mark can cause the bars to collapse; keep the door closed to maintain steady heat.When the timer dings, run a toothpick through the center; it should come out with a few moist crumbs but no wet batter. The bars will continue to set as they cool, so resist the urge to cut them immediately. Let the pan sit on a wire rack for 10 minutes.
After the brief cooling period, use the parchment overhang to lift the entire slab onto a cutting board. Slice into four equal bars with a sharp, heated knife—this ensures clean cuts and prevents the bars from crumbling. Transfer the bars to an airtight container, and there you have it: protein‑packed, gluten‑free red‑velvet bars that taste like a celebration in every bite.
Kitchen Hack: Warm the knife under hot water, dry it, and slice—this creates smoother edges and prevents the bars from sticking to the blade.
That's it — you did it. But hold on, I've got a few more tricks that'll take this to another level…
Insider Tricks for Flawless Results
The Temperature Rule Nobody Follows
Never bake these bars straight from a cold fridge; room‑temperature ingredients mix more evenly, resulting in a uniform crumb. I once tried using chilled cream cheese and the batter clumped, leading to uneven pockets of dry texture. Let the cream cheese sit out for 15 minutes while you preheat the oven, and you’ll notice a smoother, more cohesive batter.
Why Your Nose Knows Best
The moment you smell a faint toasty aroma, you’re at the perfect point to check the edges. If the scent is still buttery and not yet nutty, give the bars another 2‑3 minutes. Trusting your nose can save you from over‑baking, which would otherwise dry out the interior.
The 5‑Minute Rest That Changes Everything
After removing the pan from the oven, let the bars rest undisturbed for exactly five minutes before cutting. This short pause allows the interior to firm up, making slicing effortless and keeping the crumb tender. Skipping this step often leads to crumbly, broken pieces that look sad on a plate.
Swap the Sweetener, Not the Sweetness
If you prefer a slightly caramelized flavor, replace half of the monk fruit sweetener with a tablespoon of coconut sugar. The bars will gain a subtle caramel note without spiking the glycemic index, and the texture stays just as soft.
Chocolate Chip Distribution Hack
For an even distribution of white chocolate pockets, toss the chips in a tiny drizzle of melted coconut oil before folding them in. This creates a light coating that prevents them from sinking to the bottom, ensuring every bite gets a burst of chocolate.
Creative Twists and Variations
This recipe is a playground. Here are some of my favorite ways to switch things up:
Berry Burst
Swap half of the white chocolate chips for dried cranberries or freeze‑dried raspberry pieces. The tartness of the berries cuts through the sweetness, creating a balanced flavor profile that’s perfect for summer picnics.
Nutty Crunch
Replace the white chocolate chips with chopped toasted pecans or hazelnuts. The nuts add a satisfying crunch and a buttery depth that pairs beautifully with the velvety base.
Coffee Kick
Stir in 1 teaspoon of instant espresso powder with the dry ingredients. The coffee notes amplify the cocoa, giving the bars a mocha‑like richness that’s ideal for a morning boost.
Matcha Magic
For a green‑tea twist, add 1 tablespoon of matcha powder to the dry mix and replace the red food coloring with a dash of yellow food coloring. The result is a striking amber‑green bar that’s both visually stunning and subtly earthy.
Protein Variety
If vanilla isn’t your jam, try chocolate or unflavored whey protein. Chocolate protein intensifies the cocoa flavor, while unflavored keeps the vanilla notes subtle, letting the red‑velvet essence shine.
Gluten‑Free Oat Flour
Swap the coconut flour for an equal amount of certified gluten‑free oat flour for a milder taste and a slightly fluffier texture. Oat flour also adds a hint of sweetness, reducing the need for extra sweetener.
Storing and Bringing It Back to Life
Fridge Storage
Place the bars in an airtight container and store them in the refrigerator for up to 7 days. The cool environment preserves the moisture and keeps the protein from degrading. If you notice the surface drying out, lightly brush the top with a teaspoon of almond milk before sealing.
Freezer Friendly
Wrap each bar individually in parchment paper, then place them in a zip‑top freezer bag. They’ll last for up to 3 months. When you’re ready to enjoy one, let it thaw at room temperature for 20 minutes, then give it a quick microwave zap (10‑15 seconds) to restore that fresh‑baked softness.
Best Reheating Method
For that just‑baked feel, microwave the bar for 10 seconds, then add a tiny splash (about a teaspoon) of almond milk on top before microwaving another 5 seconds. The steam generated revives the crumb, making it taste like you just pulled it from the oven.