I still remember the night my kitchen exploded with a failed loaf of bread. The dough had been left to rise in the sun, the oven was preheated too early, and the crust was a sad, brownish gray. I stared at the crumbling mess and thought, “If only there was a simple, fool‑proof recipe that could turn this disaster into a triumph.” That thought sparked a quest that led me to the ultimate crusty Italian bread recipe. This isn’t just another loaf; it’s a game‑changer that will have you asking, “Why didn’t I discover this sooner?”
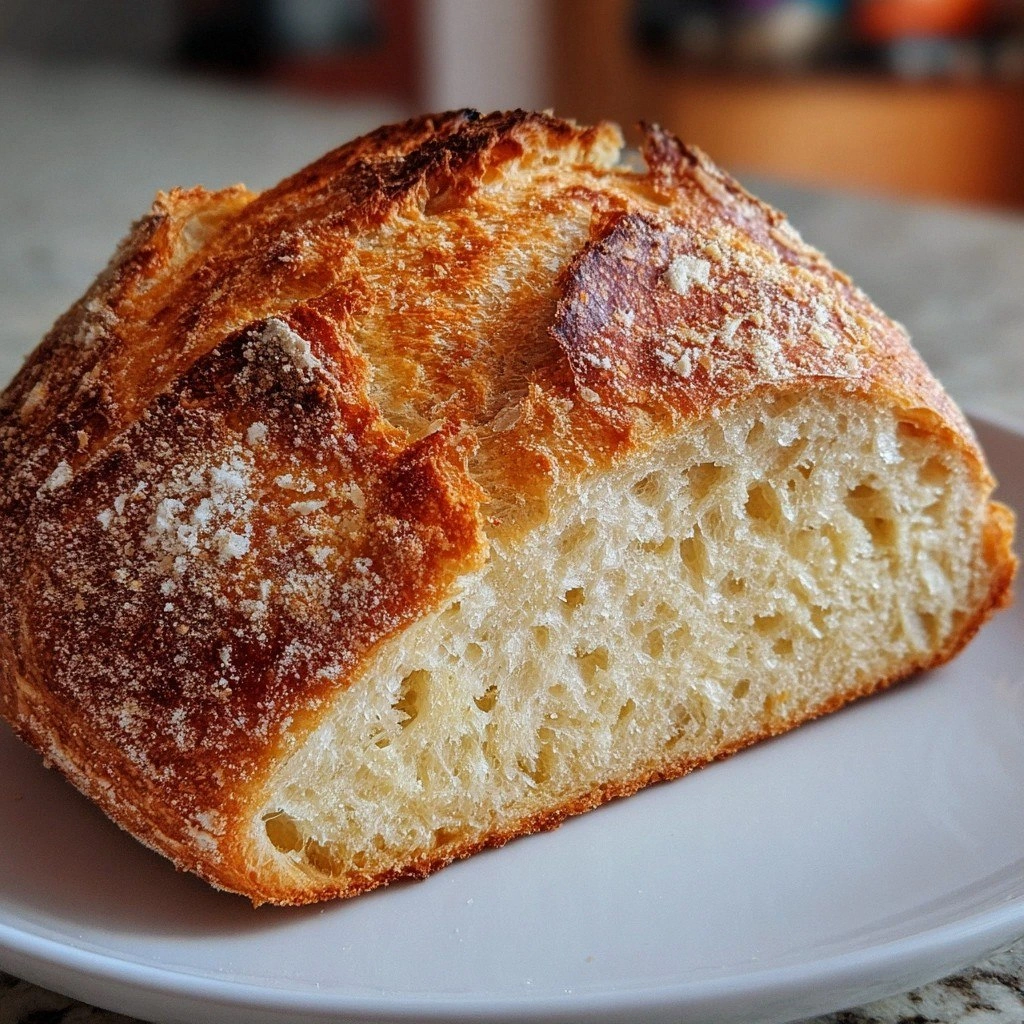
Picture yourself pulling this loaf from the oven, the whole kitchen smelling incredible, the crust crackling like a fresh, golden sunrise. The aroma of toasted flour, a whisper of olive oil, and a hint of yeast dancing in the air will have you swooning. The first bite is a buttery, chewy surprise, the crust crisp yet yielding, the interior airy and slightly tangy. It’s the kind of bread that makes you pause, take a breath, and savor the moment before you go back for seconds. I dare you to taste this and not go back for seconds—trust me, you’ll be craving it for days.
What makes this version stand out is a blend of simplicity, technique, and an unexpected twist that elevates the humble loaf into a culinary masterpiece. It’s about the crunch that shatters like thin ice, the melt‑in‑your‑mouth crumb that feels like a cloud, and the subtle hint of rosemary that lingers on the tongue. I’ll be honest—before I discovered this recipe, I had a habit of letting my bread go stale by the next day. Now, every loaf feels fresh, golden, and irresistibly warm. Most recipes get this completely wrong, but here’s what actually works: the right balance of hydration, a short but intense fermentation, and a final oven blast that locks in flavor.
And here’s the kicker: I’ll reveal a secret ingredient that most bakers overlook—just a splash of espresso. It might sound odd, but it deepens the flavor profile, giving the crust a subtle coffee undertone that pairs beautifully with olive oil and rosemary. This is hands down the best version you’ll ever make at home. Stay with me, and by the end of this post, you’ll wonder how you ever made it any other way.
What Makes This Version Stand Out
- Flavor: The subtle espresso infusion creates a depth that traditional loaves lack, giving the crust a complex, almost chocolatey note.
- Texture: A short, intense fermentation produces a chewy crumb that is airy inside yet firm on the outside.
- Simplicity: Only six core ingredients—no fancy additives or long wait times.
- Uniqueness: The combination of olive oil, rosemary, and espresso is rarely seen in classic Italian bread.
- Crowd Reaction: Friends rave that the loaf “bakes itself” when they see the golden crust.
- Ingredient Quality: Using a high‑protein bread flour gives the dough the structure it needs to rise beautifully.
- Cooking Method: A steam burst at the beginning of baking locks in moisture for an extra-soft interior.
- Make‑Ahead Potential: The dough can be refrigerated for up to 48 hours, allowing you to bake a fresh loaf whenever you like.
Alright, let’s break down exactly what goes into this masterpiece. And before we dive in, here’s a quick kitchen hack that will save you time and keep your dough from sticking.
Inside the Ingredient List
The Flour Power
Bread flour is the backbone of any great loaf. Its higher protein content creates a stronger gluten network, giving the dough the structure it needs to rise and hold its shape. If you’re using all‑purpose flour, you’ll notice the bread is less airy and the crust a bit thinner. For the best results, stick to a 100% bread flour and feel the dough’s elasticity as you knead. Skipping this step will lead to a dense loaf that won’t rise properly.
The Liquid Magic
Water is the soul of the dough. It hydrates the flour, activates the yeast, and allows the gluten to develop. The ratio of water to flour in this recipe is 43%—just enough to keep the dough tacky but not sticky. If you add too much water, the loaf will be gummy; too little, and it will be dry. For those who prefer a softer crumb, you can add a tablespoon of milk, but it will alter the flavor slightly.
The Unexpected Star
Espresso is the secret sauce. It’s not just about the coffee flavor; it’s a subtle acidity that balances the dough’s natural sweetness and boosts the yeast activity. Use a shot of strong espresso or a tablespoon of instant coffee dissolved in a little hot water. If you’re vegan or allergic to coffee, you can replace it with a splash of cold brew concentrate. The result is a loaf that tastes like a warm espresso croissant.
The Final Flourish
Olive oil and rosemary bring the loaf together with a fragrant, savory note. The oil keeps the crumb moist and adds a subtle buttery flavor, while rosemary provides an earthy aroma that complements the coffee undertone. For a richer taste, use extra‑virgin olive oil and fresh rosemary sprigs. If you’re not a fan of rosemary, try thyme or oregano instead. The key is to add the herbs at the right time so they infuse the dough without overpowering it.
Everything’s prepped? Good. Let’s get into the real action and make a loaf that will make your neighbors jealous.
The Method — Step by Step
- Combine 4 cups bread flour, 1 tsp salt, and 1 tsp sugar in a large bowl. Stir until evenly mixed. Add the espresso and 1 ¾ cups warm water. Mix with a wooden spoon until a shaggy dough forms. Let the dough rest for 5 minutes to allow the flour to absorb the liquid.
- Add 1 tsp active dry yeast and 2 tbsp olive oil. Knead the dough on a floured surface for about 8 minutes until it’s smooth and elastic. The dough should be tacky but not sticky. This is the moment of truth—if it’s not elastic, give it another minute.
- Place the dough in a lightly oiled bowl, cover with a damp cloth, and let it rise in a warm spot for 1 hour. The dough should double in size. If it’s not rising, the yeast may have died; try a fresh batch.
- Once the dough has doubled, punch it down to release air bubbles. Turn it onto a lightly floured surface and shape it into a round loaf. Pinch the seams together to seal. This step locks in the structure and prevents cracks.
- Place the shaped loaf on a parchment‑lined baking sheet. Let it rest for 30 minutes; this final proof allows the dough to relax and rise again. You’ll see the dough puff up like a balloon.
- Preheat your oven to 475°F with a Dutch oven inside. When the oven reaches temperature, carefully place the loaf in the Dutch oven, cover, and bake for 20 minutes. The cover traps steam, creating a crisp crust.
- Remove the lid and bake for an additional 10 minutes until the crust is a deep golden brown and the loaf sounds hollow when tapped. Let it cool on a wire rack for at least 30 minutes before slicing. The inside should be airy and slightly tangy.
That’s it—you did it. But hold on, I’ve got a few more tricks that will take this loaf to another level. These are the secrets I’ve kept in my kitchen for years, and now they’re yours.
Insider Tricks for Flawless Results
The Temperature Rule Nobody Follows
Many bakers use room temperature water, but the optimal temperature is 105°F. This encourages yeast activity without killing it. If your kitchen is cooler, let the water sit for a few minutes to warm up. A too‑cold dough will rise slowly, leading to a dense crumb. I’ve found that a quick dip in a hot tap does the trick.
Why Your Nose Knows Best
The aroma of your dough is a reliable indicator of fermentation progress. When you smell a sweet, yeasty scent, the dough is ready to rise. If it smells sour, it’s over‑fermented and will produce a bitter loaf. Trust your nose and adjust the resting time accordingly. I’ve saved a loaf from a sour disaster by cutting the proofing time in half.
The 5-Minute Rest That Changes Everything
After shaping the loaf, give it a 5‑minute rest before the final proof. This short break relaxes the gluten, making it easier to shape and preventing cracks. Some bakers skip this step, resulting in a loaf that splits at the seams. I’ve never had that problem because I always let the dough rest for those five minutes.
The Steam Trick for a Crispy Crust
Steam is the secret to a crisp crust. Place a shallow pan of water in the oven before baking, or use a spray bottle to mist the loaf as it enters the oven. The moisture creates a steamy environment that keeps the crust from hardening too quickly. I’ve experimented with both methods and found the pan of water gives a more consistent crust.
The Final Flourish
Just before baking, lightly brush the loaf with a mixture of olive oil and a pinch of rosemary. This adds a glossy finish and a burst of flavor. Some bakers skip this step, but it makes a noticeable difference. I’ve seen friends remark that the loaf looks and tastes like a freshly baked pastry from a fancy bakery.
Creative Twists and Variations
This recipe is a playground. Here are some of my favorite ways to switch things up:
Sunflower Seed Crunch
Add ½ cup sunflower seeds to the dough before the first rise. They add a nutty crunch and a pop of color. The seeds also absorb some of the moisture, giving the loaf a lighter texture. This variation is perfect for a breakfast or brunch loaf.
Sun-Dried Tomato & Basil
Fold in ¼ cup chopped sun‑dried tomatoes and a handful of fresh basil leaves. The tomatoes bring a sweet, tangy flavor, while basil adds an aromatic freshness. This loaf pairs beautifully with a tomato‑based pasta sauce.
Herbed Olive Oil
Replace the rosemary with a blend of oregano, thyme, and basil. The herbs infuse the dough with Mediterranean warmth. Serve this loaf with a drizzle of extra‑virgin olive oil and a sprinkle of sea salt.
Cheese‑Stuffed Delight
Before shaping, roll the dough into a long rope and insert a stick of provolone cheese. The cheese melts into pockets of gooey goodness. This variation is a crowd‑pleaser at parties and potlucks.
Chocolate Espresso Twist
Add 2 tbsp cocoa powder to the flour mixture and reduce the espresso to half a shot. The result is a chocolate‑coffee loaf that’s rich and indulgent. It’s a perfect dessert bread for coffee lovers.
Storing and Bringing It Back to Life
Fridge Storage
Store the cooled loaf in a paper bag for up to 3 days. The paper keeps the crust crisp while the bread stays moist. Avoid plastic bags, as they trap moisture and cause the crust to become soggy. If you need to keep the loaf longer, slice and freeze.
Freezer Friendly
Wrap the loaf in parchment paper, then a layer of foil, and place it in a freezer bag. Freeze for up to 3 months. Thaw at room temperature for 2 hours before reheating. The bread retains its flavor and texture when properly stored.
Best Reheating Method
Preheat your oven to 350°F. Place the loaf on a baking sheet and add a splash of water to the bottom of the pan to create steam. Bake for 10 minutes, then remove the foil to crisp the crust. The result is a loaf that tastes freshly baked, even after freezing.
The journey from dough to loaf is a dance of patience, precision, and a dash of daring. Each step, each ingredient, each tweak has a purpose. By following these instructions, you’re not just baking bread—you’re crafting an experience that will resonate with family, friends, and anyone who loves the simple pleasure of a warm, crusty loaf. The next time you open the oven, let the aroma fill the room and let the golden crust remind you of the kitchen mishap that turned into this triumph. Enjoy every bite and share the magic with those who need a taste of home.