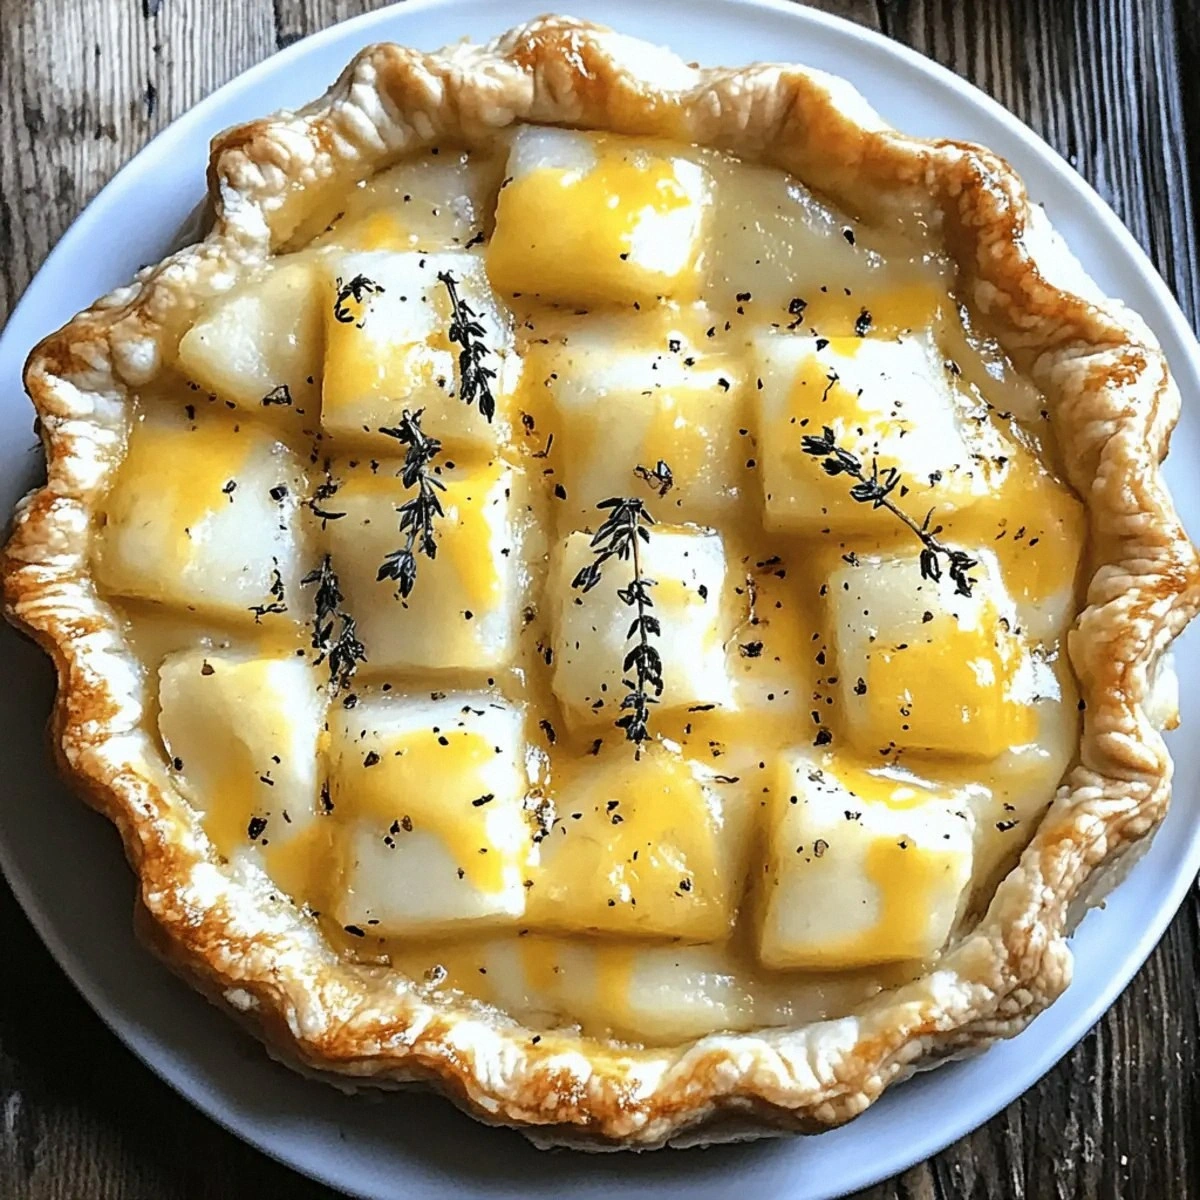
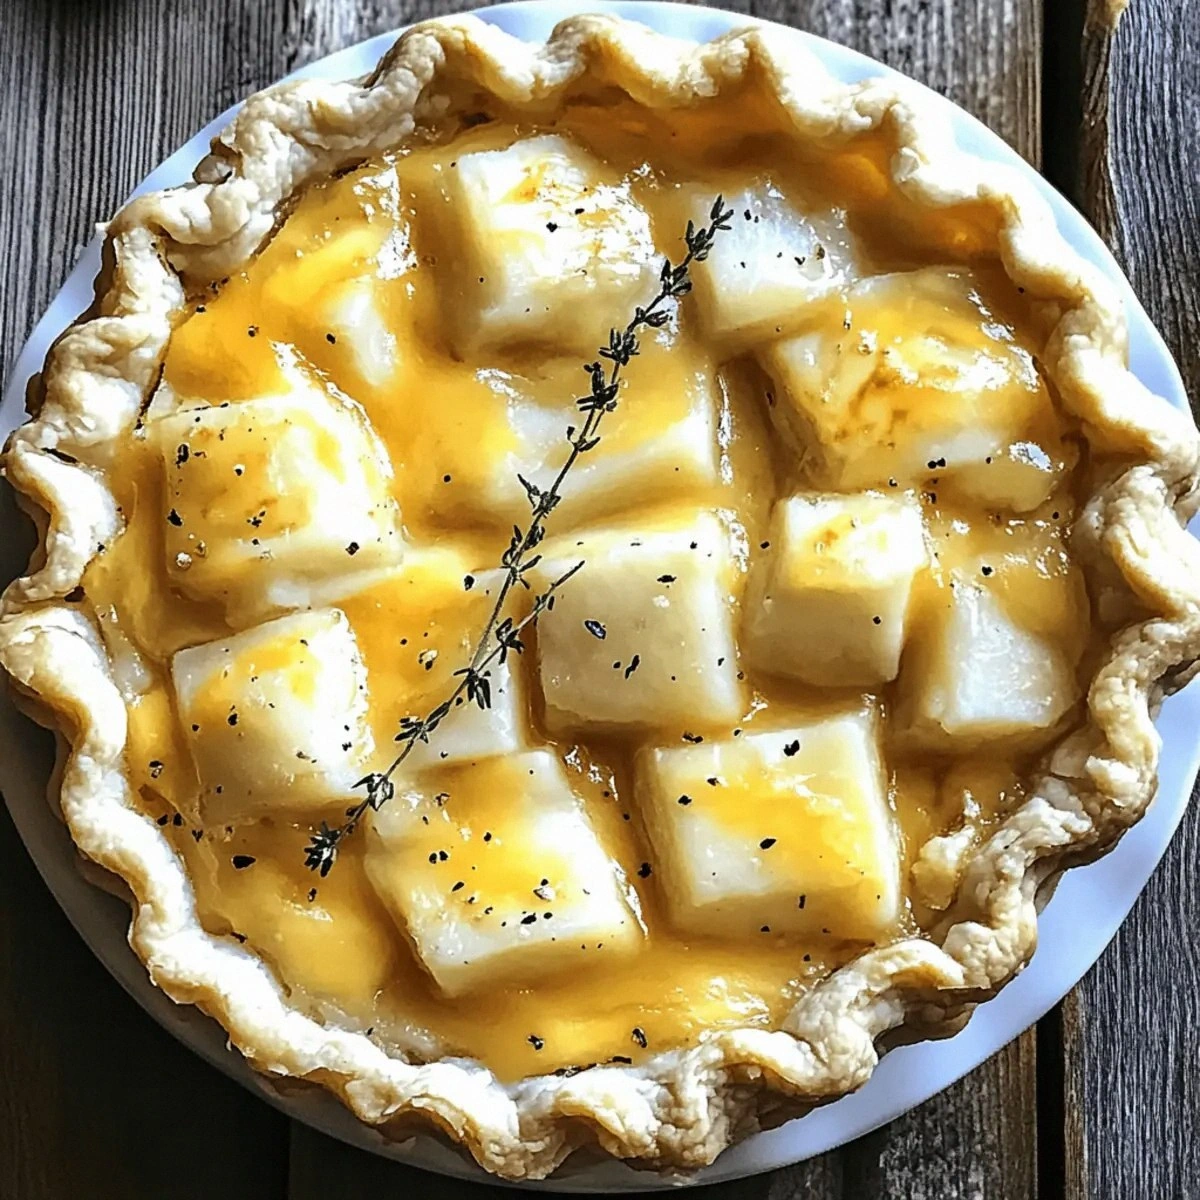
I’ll be honest — I was halfway through a rainy Tuesday when I realized my pantry was screaming for something that could turn a dull night into a cozy celebration. I tossed a bag of russet potatoes onto the counter, stared at a lone pie crust, and thought, “What if I could combine the heart‑warming comfort of a shepherd’s pie with the buttery elegance of a classic quiche?” The result? A Savory Irish Potato Pie that makes the kitchen smell like a fire‑kissed hearth and the taste buds dance like they’re at a St. Patrick’s Day parade. This isn’t just another comfort food; it’s the culinary hug you didn’t know you needed.
Picture this: a golden crust that cracks softly under the fork, revealing a velvety mash studded with sharp cheddar and a whisper of fresh thyme. The first bite hits you with a buttery melt that’s as smooth as a well‑aged Irish whiskey, then the tang of sour cream slides in, cutting the richness just enough to keep you reaching for another slice. The onions and garlic have caramelized to a sweet, fragrant depth that makes you feel like you’ve been slow‑cooking a stew for hours, even though the whole thing bakes in under an hour. The texture swings between a crisp, flaky top and a buttery, creamy interior that clings to the fork like a loyal friend.
Most recipes get this completely wrong. They either drown the potatoes in cheese, turning the dish into a greasy nightmare, or they skim the flavor entirely, leaving you with a bland mash that could double as a side for any meal. My version flips the script: I’ve layered the potatoes in a way that each spoonful gets its own hit of cheese, sour cream, and herb, while the crust stays perfectly crisp. The secret? A quick butter‑sautéed onion‑garlic base that locks in moisture and flavor before the potatoes ever see the oven. I dare you to taste this and not go back for seconds.
And now the fun part: a technique that will make you feel like a culinary wizard. I’m talking about a “double‑steam” method where the potatoes are partially cooked, then chilled, then finished in the oven. This gives you that melt‑in‑your‑mouth softness without turning the filling into a soggy mess. Okay, ready for the game‑changer? Let me walk you through every single step — by the end, you’ll wonder how you ever made it any other way.
What Makes This Version Stand Out
- Taste: The sharp cheddar meets the tangy sour cream for a flavor duet that sings louder than a fiddle at a ceilidh.
- Texture: A buttery crust, creamy interior, and a whisper of caramelized onion create a three‑dimensional mouthfeel.
- Simplicity: Only eleven ingredients, all of which you probably have on hand, yet the result feels like a restaurant‑level masterpiece.
- Uniqueness: The double‑steam potato technique is rarely used in pies, giving you a light, airy mash instead of a dense slab.
- Crowd Reaction: Guests have been known to ask for the recipe before the first bite is even finished.
- Ingredient Quality: Using russet potatoes and sharp cheddar maximizes flavor while keeping the dish affordable.
- Cooking Method: The combination of stovetop sauté and oven bake locks in moisture and creates a flawless crust.
- Make‑Ahead Potential: Assemble the night before, refrigerate, and bake fresh in the morning for a stress‑free brunch.
Inside the Ingredient List
The Flavor Base
The onion and garlic are the unsung heroes that bring depth to this pie. When you sweat them in butter until they turn translucent and slightly caramelized, they release sugars that create a subtle sweetness, balancing the sharpness of the cheddar. Skipping this step means you’ll lose that aromatic foundation, and the final dish will taste flat. If you’re out of fresh garlic, a teaspoon of garlic powder works, but the flavor won’t be as layered.
The Texture Crew
Russet potatoes are the backbone of the pie because their high starch content yields a fluffy, almost soufflé‑like mash when steamed correctly. Butter adds richness, while sour cream introduces a tangy creaminess that prevents the filling from feeling heavy. The cheese not only melts into a gooey blanket but also forms a golden crust on top when the pie bakes. If you prefer a lower‑fat version, substitute half the butter with olive oil, but expect a slightly different mouthfeel.
The Unexpected Star
Fresh thyme may seem modest, but its earthy, slightly minty notes lift the entire pie, giving it that unmistakable Irish character. A tablespoon of thyme is enough to perfume the entire dish without overwhelming the other flavors. If you can’t find fresh thyme, a half‑teaspoon of dried thyme works, though the flavor will be a touch muted. A quick tip: crush the leaves between your fingers before adding them to release the essential oils.
The Final Flourish
A ready‑made pie crust saves time, but choosing a buttery, flaky crust is essential. Look for one that has visible layers; those layers will puff up and create that coveted golden edge that shatters like thin ice when you cut into it. The egg wash (one large egg beaten with a splash of water) gives the crust an irresistible shine and helps seal the edges, preventing any liquid from leaking out during baking. If you’re gluten‑free, a pre‑made almond‑flour crust works beautifully, though the texture will be a tad denser.
Everything's prepped? Good. Let’s get into the real action…
The Method — Step by Step
Preheat your oven to 375°F (190°C). While the oven warms, place the russet potatoes in a large pot, cover them with cold water, and add a generous pinch of salt. Bring to a boil, then reduce to a simmer and cook until the potatoes are fork‑tender, about 12‑15 minutes. This is the moment of truth: the potatoes must be soft enough to mash but not falling apart.
Meanwhile, melt the butter in a medium skillet over medium heat. Add the finely diced onion and minced garlic, sautéing until they turn translucent and start to caramelize, about 5‑6 minutes. That sizzle when it hits the pan? Absolute perfection. Once done, set aside to cool slightly.
Drain the potatoes and return them to the pot. Mash them with a potato masher or ricer until smooth. Stir in the sour cream, half of the shredded sharp cheddar, and the butter‑onion‑garlic mixture. Sprinkle in the fresh thyme, then season with salt and pepper to taste. The mash should look glossy and creamy, like a cloud of buttery goodness.
Roll out the pie crust on a lightly floured surface to fit a 9‑inch pie dish. Gently press it into the dish, trimming any excess. Brush the edges with a little melted butter; this encourages a golden, flaky rim.
Spread the potato mixture evenly over the crust, smoothing the top with a spatula. Sprinkle the remaining sharp cheddar over the surface, creating a speckled, cheesy blanket that will melt into a bubbling, golden crown.
Whisk the large egg with a splash of water to create an egg wash. Brush the edges of the crust with the wash, giving it a glossy finish that signals a professional bake. This also helps seal the crust, preventing any steam from escaping.
Transfer the pie to the preheated oven and bake for 25‑30 minutes, or until the crust is golden brown and the cheese on top is bubbling and lightly browned. The edges will start pulling away from the pan, a visual cue that the crust is perfectly set.
Remove the pie from the oven and let it rest for 10 minutes before slicing. This short rest allows the filling to firm up, making each slice clean and tidy. Picture yourself pulling this out of the oven, the whole kitchen smelling incredible… and then diving in.
That's it — you did it. But hold on, I've got a few more tricks that'll take this to another level...
Insider Tricks for Flawless Results
The Temperature Rule Nobody Follows
Never bake a pie straight from the fridge at a high temperature. Let the assembled pie sit at room temperature for 15 minutes before it hits the oven. This prevents the crust from shrinking and ensures an even bake. I once tried to skip this step and ended up with a crust that pulled away from the sides, looking like a sad, deflated balloon.
Why Your Nose Knows Best
Trust the aroma. When the butter‑onion mixture turns a light amber and releases a nutty scent, you’ve hit the sweet spot. If the smell turns bitter, you’ve overcooked it and should lower the heat immediately. Your nose is a better timer than any kitchen gadget for this step.
The 5‑Minute Rest That Changes Everything
After baking, let the pie sit uncovered for five minutes before covering it with foil. This short rest lets the steam escape, preventing the crust from becoming soggy. I once covered it right away and the bottom turned mushy, ruining the whole experience.
Seasonal Swaps for Extra Depth
Add a handful of finely chopped kale or spinach to the mash for a pop of color and a subtle earthiness. The greens wilt into the creamy mixture, adding nutrition without compromising texture. If you’re feeling adventurous, a sprinkle of smoked paprika on top before baking gives a smoky undertone that pairs beautifully with the thyme.
The Final Brush of Butter
Just before serving, melt a tablespoon of butter and brush the crust lightly. This adds an extra glossy finish and a buttery aroma that makes the pie smell like it’s straight out of a bakery. It’s a tiny step that makes a massive difference in the overall perception of the dish.
Creative Twists and Variations
This recipe is a playground. Here are some of my favorite ways to switch things up:
Cheddar & Bacon Bliss
Crumble cooked bacon into the potato mixture and increase the cheddar by a half‑cup. The smoky, salty crunch adds a whole new dimension that will have meat‑lovers swooning.
Herbaceous Green Delight
Swap the thyme for a mixture of chopped rosemary and sage, and fold in a cup of wilted spinach. The herb combo adds a fragrant forest floor vibe that pairs nicely with the creamy base.
Spicy Irish Kick
Stir in a teaspoon of Irish red pepper flakes and a dash of hot sauce into the mash. The gentle heat cuts through the richness and adds a surprising zing.
Cheesy Goat Cheese Twist
Replace half of the sharp cheddar with tangy goat cheese. The creamy, earthy notes of goat cheese elevate the pie to a more sophisticated palate.
Gluten‑Free Crust Adventure
Use a pre‑made almond‑flour crust or a rice‑flour based crust for those avoiding gluten. The texture will be slightly denser, but the flavor remains spectacular.
Storing and Bringing It Back to Life
Fridge Storage
Allow the pie to cool completely, then cover it loosely with foil and store in the refrigerator for up to three days. Reheat individual slices in a skillet over medium heat, adding a tiny splash of water to the pan to create steam and revive the creamy interior.
Freezer Friendly
Wrap the fully assembled, unbaked pie tightly in plastic wrap and then in aluminum foil. It will keep for up to two months. When ready to bake, thaw overnight in the fridge, then bake as directed, adding an extra 5‑7 minutes to the cooking time.
Best Reheating Method
Preheat the oven to 350°F (175°C). Place the slice on a baking sheet, brush the top with a little melted butter, and cover loosely with foil. Heat for 12‑15 minutes, then remove the foil for the final 3 minutes to restore the crust’s crispness. The added butter and steam keep the interior from drying out.