Picture this: it’s midnight, the pantry lights flicker, and you’ve just burned the last batch of store‑bought cookies. The kitchen smells like charcoal regret, and your friends are texting, “What’s for dessert?” I was there, half‑asleep, staring at a bag of Oreos that had been gathering dust for weeks. I dared myself to turn that disappointment into something unforgettable, and that’s how the first batch of Oreo mochi was born. I’ll be honest — I ate half the batch before anyone else got a chance to try it, and that was the best mistake of my culinary career.
The moment I pulled the first mochi out of the steamer, the room filled with a buttery, chocolatey aroma that wrapped around me like a warm blanket. The texture was soft enough to melt on the tongue, yet chewy enough to give that satisfying pull you get from the best Japanese sweets. Imagine biting into a cloud that’s been infused with the crunch of crushed Oreos, the cocoa richness dancing with a subtle sweet grainy note from the glutinous rice flour. My taste buds were doing cartwheels, and I knew I had stumbled onto a game‑changer.
Most recipes out there either skip the cocoa entirely or drown the delicate chewiness with too much oil, leaving you with a greasy mess that sticks to the pan. This version, however, balances the fudgy depth of cocoa and the buttery richness of corn oil with the classic chew of mochi, all while keeping the Oreo crunch perfectly intact. The secret? A tiny dash of cornstarch that prevents the dough from becoming gummy, and a precise steam time that locks in moisture without overcooking. I’m about to hand you the exact method that turned my kitchen disaster into a dessert that has become the talk of every gathering.
Let me walk you through every single step — by the end, you’ll wonder how you ever made it any other way. Okay, ready for the game‑changer? This next part? Pure magic.
What Makes This Version Stand Out
- Texture: The mochi is soft, pillowy, and just chewy enough to give that “pull‑away‑from‑the‑plate” feeling without being rubbery.
- Flavor Fusion: Cocoa and Oreo crumbs create a chocolate‑cookie duet that’s richer than a brownie but lighter than a cake.
- Simplicity: Only seven ingredients, all pantry staples, and a single pot of steam — no fancy equipment needed.
- Visual Appeal: The dark cocoa hue speckled with Oreo crumbs looks as impressive as it tastes, perfect for Instagram.
- Crowd Reaction: I dare you to taste this and not go back for seconds; even the most skeptical friends become instant fans.
- Ingredient Quality: Using glutinous rice flour ensures that signature chew, while corn oil adds a silky mouthfeel without heaviness.
- Cooking Method: Steaming, not baking, preserves moisture and gives the mochi its signature bounce.
- Make‑Ahead Potential: These bite‑size delights keep well in the fridge, making them perfect for prep‑ahead parties.
Inside the Ingredient List
The Flavor Base
Glutinous Rice Flour (1 cup): This is the heart of any mochi. Its high amylopectin content gives the dough that stretchy, elastic quality you love. Skipping it for regular flour will leave you with a dry, crumbly texture that’s nothing like the real deal. If you can’t find glutinous rice flour, try a 50/50 mix of regular rice flour and tapioca starch, but expect a slightly different chew.
Cocoa Powder (2 tbsp): Unsweetened cocoa brings deep chocolate flavor without adding extra sugar. It also gives the mochi its gorgeous dark hue. For a milder chocolate taste, you can substitute half the cocoa with melted dark chocolate, but watch the extra fat that could affect the texture.
The Texture Crew
Cornstarch (2 tbsp): This tiny addition prevents the mochi from turning gummy during steaming. It creates a delicate barrier that keeps the dough smooth. If you forget it, you’ll end up with a sticky blob that clings to everything.
White Sugar (1/4 cup): Provides sweetness and helps with caramelization during the brief steam. You could swap it for coconut sugar for a caramel‑like nuance, but remember that it will darken the dough a shade deeper.
The Unexpected Star
Corn Oil (1/2 cup): A neutral‑tasting oil that adds richness without overwhelming the chocolate flavor. It also helps the dough stay supple after cooling. If you’re looking for a healthier twist, try avocado oil, but it may impart a faint greenish tint.
Milk (1/2 cup): The liquid component that hydrates the flour and creates a smooth batter. Whole milk yields the creamiest texture; skim milk works fine but results in a slightly firmer bite. For dairy‑free, substitute almond milk, though the flavor will shift subtly.
The Final Flourish
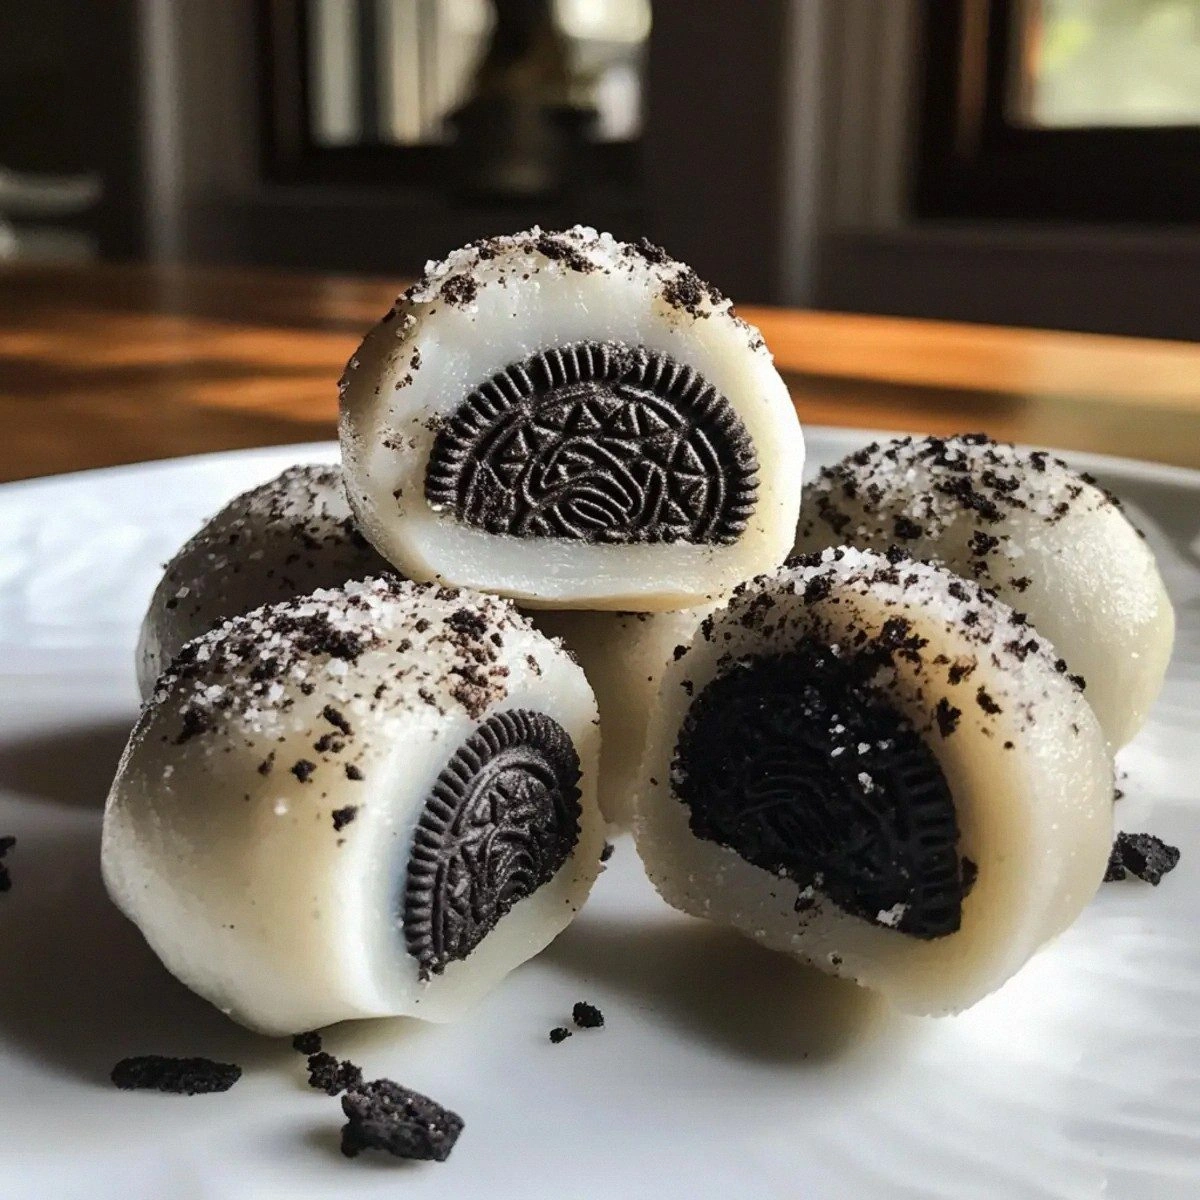
Oreo Cookies (1 cup, crushed): The crunch and iconic cream filling are what set this mochi apart. Crushing them finely ensures they blend seamlessly into the dough, while leaving some larger bits for surprise bursts of cookie crunch. If you’re allergic to wheat, try gluten‑free sandwich cookies, but the flavor profile will change.
Everything's prepped? Good. Let's get into the real action...
The Method — Step by Step
-
First, gather all your dry ingredients in a large mixing bowl: glutinous rice flour, cornstarch, cocoa powder, and white sugar. Whisk them together until the mixture is uniformly dark brown, with no visible streaks of cocoa. This step is crucial because any lump will become a tiny, unpleasant pocket in the finished mochi. Tip: Use a fine-mesh sieve to break up any stubborn clumps.
Kitchen Hack: Add the dry mix to the wet ingredients gradually while whisking to avoid a mountain of flour that’s hard to stir. -
In a separate saucepan, combine corn oil and milk. Warm the mixture over low heat until it just begins to steam — do not let it boil. The oil should become a silky liquid that coats the flour when mixed. Watch the temperature: around 140°F (60°C) is perfect; any hotter and the oil will separate.
Watch Out: Overheating the oil can cause a greasy texture that ruins the chewiness. -
Slowly pour the warm oil‑milk mixture into the bowl of dry ingredients, whisking continuously. The batter should transform into a smooth, glossy paste with the consistency of thick pancake batter. If you see lumps, keep whisking; the steam will help dissolve them.
-
Fold in the crushed Oreo cookies gently, ensuring they are evenly distributed. You’ll notice the dough darkening even more, speckled with cookie bits that will later burst with creamy crunch. This is the moment where the magic really starts to happen.
-
Prepare a steamer: line the bottom with parchment paper punched with a few holes to allow steam to circulate. Spoon the batter onto the parchment in even rounds about 2‑inch wide, leaving space between each piece because they will expand slightly.
Kitchen Hack: Use a silicone spatula to smooth the tops; it prevents the mochi from forming a crust. -
Cover the steamer and bring the water to a rolling boil. Steam the mochi for exactly 20 minutes. You’ll hear a gentle hissing as the steam works its magic. After 20 minutes, the edges should start pulling away from the parchment, and a faint sweet aroma will fill your kitchen.
-
Turn off the heat and let the steamer sit for an additional 5 minutes. This resting period lets the interior finish cooking gently, preventing a gummy center. Resist the urge to open the lid early; patience is key.
-
Using a heat‑proof spatula, carefully transfer the mochi to a cooling rack. Let them cool to room temperature; they will firm up just enough to handle without sticking. If you’re in a hurry, a quick 2‑minute blast in the fridge works, but the texture is best when cooled naturally.
-
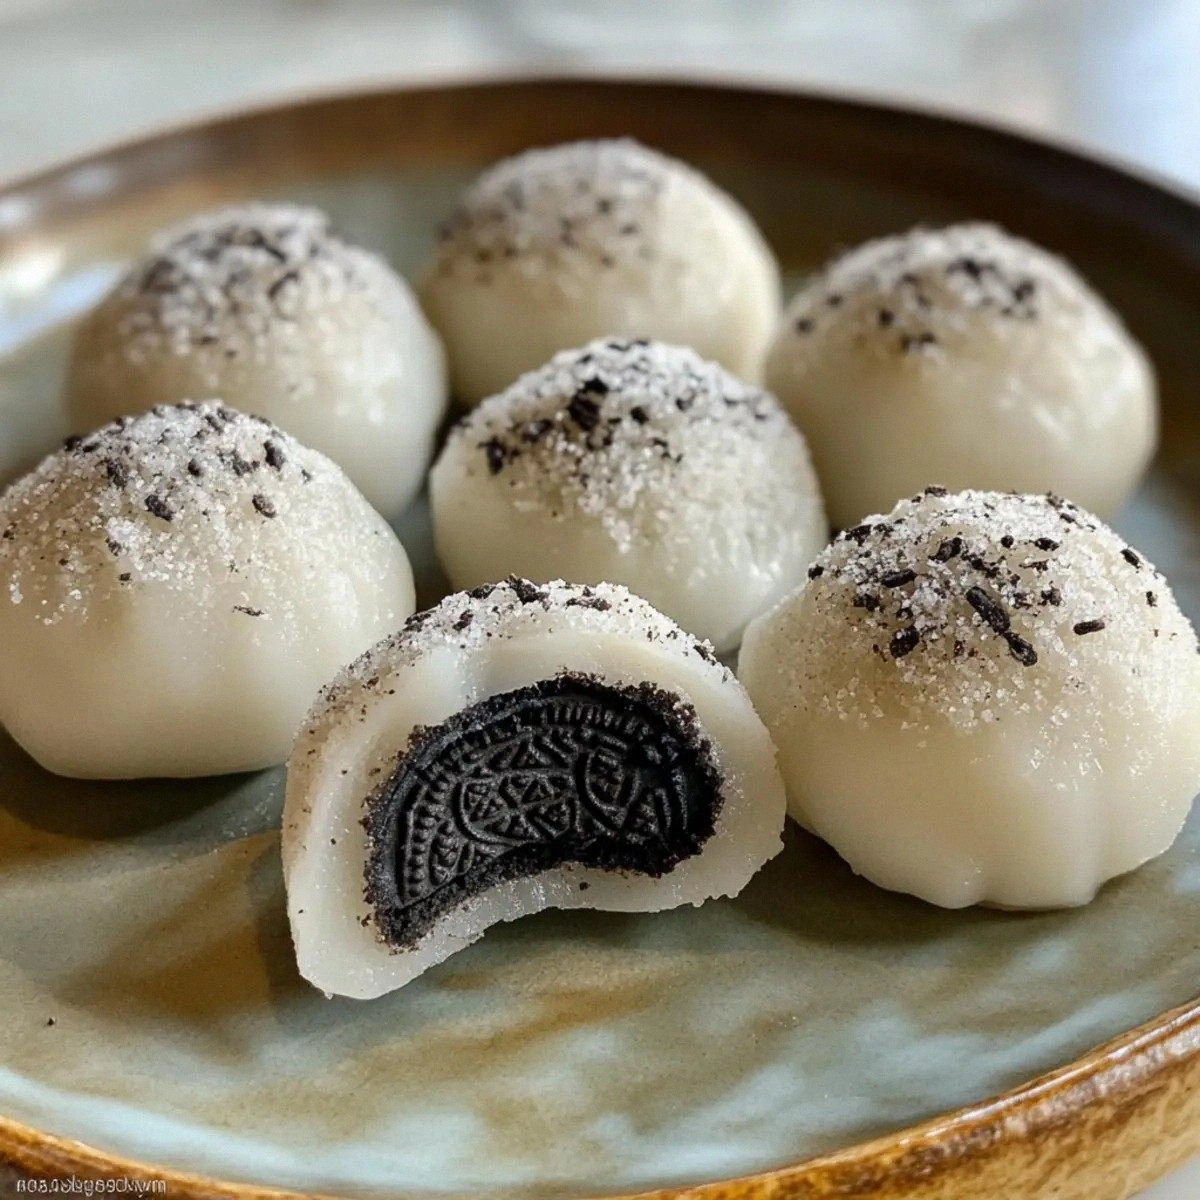
Serve the mochi as is, or dust them lightly with powdered sugar for an extra touch of elegance. Pair with a cold glass of milk, and watch your guests' eyes widen with each bite. That sizzle when it hits the pan? Absolute perfection — except we’re steaming, so the “sizzle” is the gentle pop of steam.
That's it — you did it. But hold on, I've got a few more tricks that'll take this to another level...
Insider Tricks for Flawless Results
The Temperature Rule Nobody Follows
Steam at a steady 212°F (100°C). If the water isn’t bubbling vigorously, the mochi will turn out dense. I once tried a low‑heat steam and ended up with a doughy mess that clung to the parchment. Keep the lid tight and the water level high enough to sustain a rolling boil.
Why Your Nose Knows Best
When the mochi is done, you’ll smell a faint chocolate‑toasted note. If the aroma is still raw, give it another minute. Your nose is a better timer than any kitchen gadget for this delicate dessert.
The 5‑Minute Rest That Changes Everything
After steaming, let the mochi sit covered for five minutes. This short rest allows the starches to set, giving you that perfect “pull‑away” texture. Skipping this step leaves a gummy interior that’s hard to bite through.
Dusting Drama
A light dusting of powdered sugar not only adds a visual contrast but also prevents the mochi from sticking together when stacked. Use a fine mesh sifter for an even coating; clumps ruin the smooth finish.
Cold Water Splash
If your mochi feels a tad dry after refrigeration, a quick splash of cold water on the surface before reheating restores that soft chew. The water creates a thin steam layer that revives the texture without making it soggy.
Creative Twists and Variations
This recipe is a playground. Here are some of my favorite ways to switch things up:
Matcha Madness
Replace the cocoa powder with 2 tablespoons of matcha powder and add a teaspoon of honey. The result is a vibrant green mochi with a subtle earthy sweetness that pairs beautifully with the Oreo crunch.
White Chocolate Whisper
Swap the cocoa for white chocolate chips (2 tbsp) and use vanilla‑flavored Oreo cookies. The flavor becomes a delicate vanilla‑white chocolate duet, perfect for a spring brunch.
Spicy Chili Crunch
Mix in a pinch of cayenne pepper with the cocoa and use chocolate‑covered spicy Oreos. The heat adds a surprising kick that balances the sweet chew, ideal for daring palates.
Nutty Delight
Stir in ¼ cup finely chopped toasted almonds or hazelnuts after folding in the Oreo crumbs. The nuts add a buttery crunch that complements the soft mochi texture.
Fruit Fusion
Gently swirl in 2 tbsp of raspberry puree into the batter before steaming. The fruit’s acidity cuts through the richness, creating a bright, tangy contrast.
Vegan Victory
Replace corn oil with coconut oil, use almond milk, and choose vegan Oreo‑style cookies. The result is a plant‑based version that still delivers that iconic chew and crunch.
Storing and Bringing It Back to Life
Fridge Storage
Place the cooled mochi in an airtight container lined with parchment paper. They stay fresh for up to five days. Keep them in the fridge’s main compartment, not the door, to maintain a stable temperature.
Freezer Friendly
For longer storage, arrange the mochi on a baking sheet, freeze for two hours, then transfer to a zip‑top bag. They’ll keep for up to two months. When ready, thaw at room temperature for 15 minutes, then give them a quick steam to revive the chew.
Best Reheating Method
Steam the mochi for 3‑4 minutes, or microwave for 15 seconds with a splash of water on top. The water creates steam that re‑hydrates the dough, making it as soft as the first day. Add a tiny splash of water before reheating — it steams back to perfection.