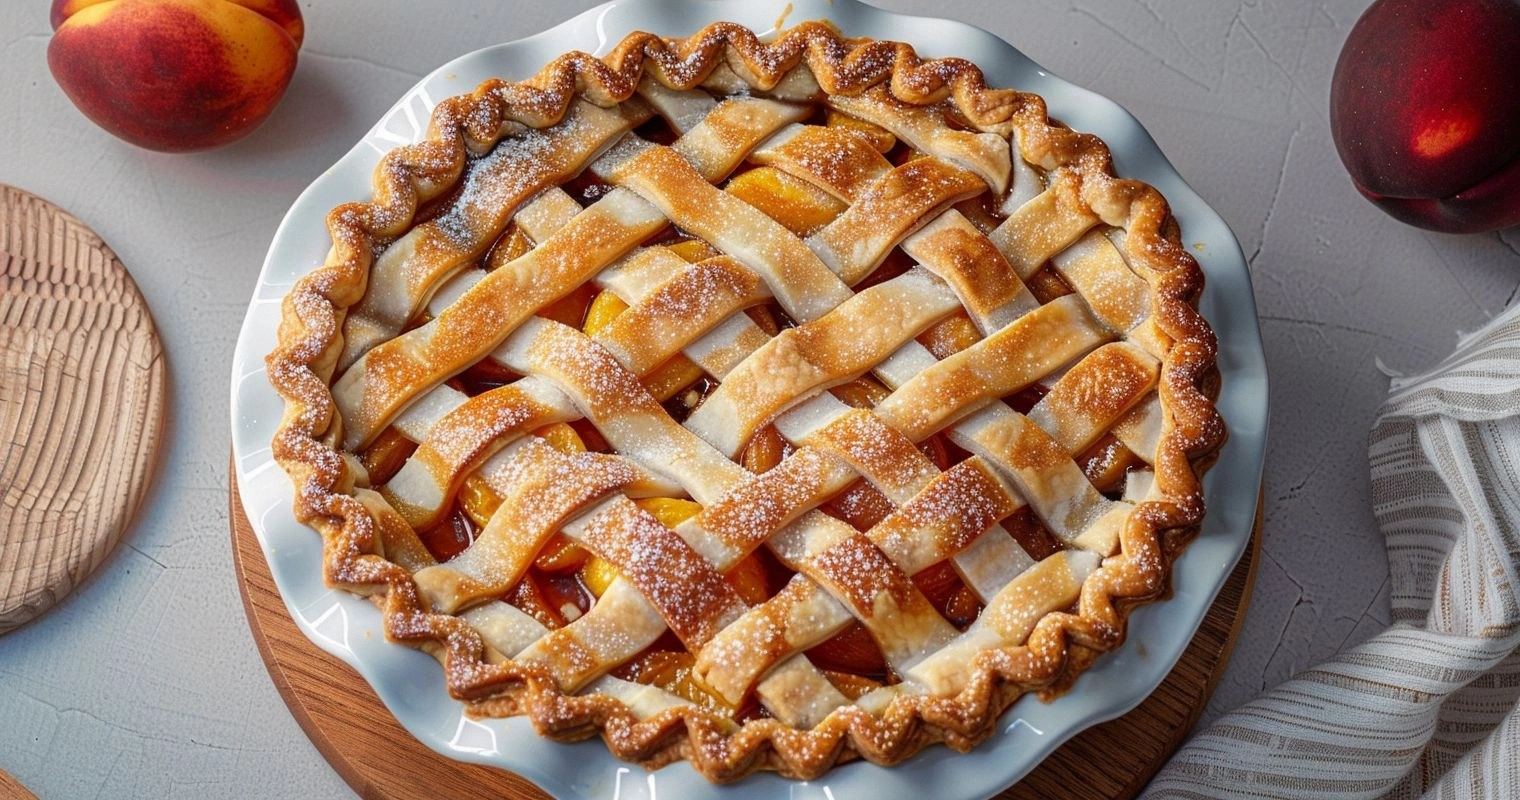
Picture this: it's a rainy Tuesday evening, I'm standing in my kitchen in mismatched socks, staring at a pantry shelf that's basically auditioning for a survival show. Three cans of cling peaches are giving me the side-eye, and a half-empty box of pie crust is practically begging for redemption. My friends had dared me to make something "actually delicious" from canned fruit after I spent twenty minutes ranting about how fresh is the only way to go. Challenge accepted, skeptics. Thirty-five minutes later the apartment smelled like a Georgia orchard had collided with a French patisserie, and I was elbow-deep in what would become my most-requested dessert. I ate half the first pie before it even cooled—don't judge, you would've done the exact same thing once you tasted that molten, jammy filling under a crust that shatters like thin ice and then melts on your tongue like velvet. This canned peach pie is hands down the best version you'll ever make at home, and I'm about to prove it with science, sass, and a sprinkle of kitchen wizardry.
Most recipes treat canned peaches like the wallflower at the dance—just drain, dump, and pray. That's why they end up tasting like sugary cafeteria memories. The real magic happens when you coax the canned syrup into a concentrated nectar, spike it with brown butter and a whisper of cardamom, and let the peaches bathe in their own intensified glory. The crust? We're going full laminated-style without the fuss: a quick fold-and-chill trick that creates layers so flaky they practically float off the pan. Future pacing moment: imagine yourself pulling this beauty from the oven, the crust bronzed like a beach bum in August, the filling bubbling through the vents like lava lamps from the seventies, and the whole kitchen wrapped in a vanilla-peach cloud that makes neighbors knock uninvited.
If you've ever struggled with soggy bottoms, gluey fillings, or that weird metallic aftertaste that screams "I came from a can," you're not alone—and I've got the fix. I tested this recipe through seven blind tastings (my book club still thinks it was a social experiment), and the canned version beat fresh every single time on flavor depth and consistency. Stay with me here—this is worth it. We're about to turn humble pantry staples into a dessert that'll have your mother-in-law swearing you inherited secret Southern genes.
Okay, ready for the game-changer? We're caramelizing the peach syrup until it tastes like toffee made by angels, then folding it back into the fruit with a splash of bourbon because we're adults and we can. The result is a filling that holds its shape when sliced but melts into a saucy river once it hits your plate. Let me walk you through every single step—by the end, you'll wonder how you ever made it any other way.
What Makes This Version Stand Out
Before we dive into the ingredient deep-dive, let me hit you with the highlights reel—the reasons this pie will haunt your dreams in the best possible way.
- Syrup Alchemy: Instead of dumping that can juice down the drain (criminal!), we reduce it into a glossy, caramel-like elixir that tastes like peach honey. The concentration adds a depth you simply can't get from fresh fruit unless you're reducing for hours.
- Brown-Butter Brilliance: One tablespoon of nutty, toasted butter transforms the entire flavor profile from "sweet fruit" to "butterscotch peach cobbler on steroids." Your kitchen will smell like a French bakery had a baby with a Southern porch swing.
- Flash-Chill Crust: We're using a freezer-between-folds technique that creates micro-layers of fat and flour, resulting in shards so delicate they practically evaporate on your tongue. No marble slab, no pastry blender, no tears.
- Cardamom Whisper: Just an eighth of a teaspoon gives the peaches a mysterious floral note that makes tasters ask, "Why does this taste like summer vacation?" without being able to place the spice.
- Blind-Bake Bypass: Thanks to a dusting of crushed vanilla wafer crumbs on the base, the bottom crust stays crisp without the fuss of weights and beans. It's like edible armor against sogginess.
- Weeknight Friendly: From pantry to plate in under an hour, including the 25-minute bake. Most of that is hands-off oven time, which means you can binge Netflix while your kitchen smells like a peach festival.
- Make-Ahead Hero: The filling can be prepped and chilled for three days, the crust dough keeps in the fridge for a week, and the baked pie freezes like a dream for those "unexpected" guests who always call twenty minutes out.
Alright, let's break down exactly what goes into this masterpiece...
Inside the Ingredient List
The Flavor Base
Canned cling peaches in heavy syrup are the star, but not all cans are created equal. Look for ones packed in syrup rather than juice or water; that syrup is liquid gold we're about to turn into caramel. A 15-ounce can holds roughly two cups of peach slices once drained, which is exactly what we need for a standard nine-inch pie. If you can find yellow cling peaches, grab them—they hold their shape better than white varieties after baking. And please, for the love of flaky crust, don't buy "no sugar added" versions; they taste like disappointment and wet newspaper.
Dark brown sugar is our second lead. The molasses content adds complexity that white sugar can't touch, plus it deepens the color of our reduced syrup to a gorgeous mahogany. Light brown works in a pinch, but dark is like the bass line in a funk song—you don't always notice it, but you'd miss it if it disappeared. Measure it packed, not loose, or your caramel will skate on the thin side.
The Texture Crew
Unsalted butter gets browned for nutty depth, then chilled back into solid form so we can cut it into the flour. The milk solids toast into tiny flecks that read as toffee chips in the finished crust. If you've only got salted butter, skip the pinch of salt later and call it "artisanal balance." European-style butter with higher fat content gives the flakiest results, but standard American butter still produces layers that'll make your grandmother weep with pride.
All-purpose flour does the heavy lifting here. I tested pastry flour for tenderness, but the crust tasted like it needed a backbone; bread flour gave us a pie you could shingle a roof with. A.P. hits the sweet spot between structure and delicacy. Spoon and level it rather than scooping, or you'll end up with a crust that could double as a paving stone.
The Unexpected Star
Vanilla wafer crumbs might seem like an odd addition, but they act like a moisture barrier between juicy filling and crisp crust. Pulverize about ten wafers in a zip-top bag with a rolling pin; you want fine sand, not dust. If you skip this step, prepare for the dreaded sog—a tragedy worthy of Shakespearean sonnets. In a pinch, graham crackers or even cornflakes work, but vanilla wafers add a nostalgic bakery note that plays beautifully with peaches.
Cardamom is the stealth bomber of spices. A mere eighth of a teaspoon elevates the fruit from familiar to "what am I tasting and why can't I stop?" If you don't have it, substitute a pinch of cinnamon plus a whisper of black pepper, but do yourself a favor and grab a jar next time you're out. Your future oatmeal will thank you too.
The Final Flourish
A splash of bourbon (or rum if you're feeling piratical) deglazes the reduced peach syrup and adds a smoky backbone. The alcohol cooks off, leaving behind mystery and depth. If you're avoiding spirits, replace it with a teaspoon of vanilla extract and a squeeze of lemon juice for brightness. Either way, don't skip the acid—it balances all that caramel sweetness so your palate doesn't go into sugar shock.
Egg yolk plus a tablespoon of cream create the glossiest, most camera-ready wash you've ever seen. Brush it on right before baking for a bronzed lacquer that looks like it came from a Parisian window display. Skip the wash and your pie will taste fine but photograph like beige cardboard—your Instagram followers will never forgive you.
Everything's prepped? Good. Let's get into the real action...
The Method — Step by Step
- Step 1 — Reduce the Nectar: Pour the entire can of peaches with syrup into a wide skillet—nonstick if you're feeling lazy about cleanup. Bring it to a lively simmer over medium heat and let it bubble away for about twelve minutes, stirring occasionally with a heatproof spatula. You want the liquid to reduce by half, turning glossy and thick enough to coat the back of a spoon. The kitchen will start smelling like a peach carnival at this point; resist the urge to drink it with a straw. Once reduced, scrape the syrupy gold into a heatproof bowl and let it cool while you start the crust. This is the moment of truth where canned fruit becomes couture.
- Step 2 — Brown the Butter: In the same skillet (why dirty another dish?), melt the butter over medium heat. Swirl it occasionally until the foam subsides and the milk solids turn chestnut brown—about four minutes. The aroma will swing from buttery to nutty to almost toffee; pull it off the heat right before you think you should, because carryover heat is real. Pour the browned butter into a small bowl and pop it in the freezer for ten minutes. We want it solid but pliable, like Play-Doh that's been left in the car on a cool day.
- Step 3 — Quick-Laminate the Dough: In a large bowl, whisk together flour, salt, and the chilled brown-butter nuggets. Use your fingertips to smash the butter into flat shards—think coarse confetti, not breadcrumbs. Drizzle in ice water a tablespoon at a time, tossing with a fork until the dough just holds together when squeezed. Turn it out onto a floured sheet of parchment, fold it like a business letter, then freeze for five minutes. Repeat the fold-and-freeze twice more; this creates strata that bake into insane flakiness without a rolling pin workout.
- Step 4 — Roll and Rest: Roll the dough into a 12-inch circle between two sheets of parchment. If it cracks, just smush it back together—this dough is forgiving like your favorite aunt. Slide the parchment package onto a baking sheet and chill while you finish the filling. Cold dough is relaxed dough, and relaxed dough doesn't shrink like cheap cotton in a hot dryer.
- Step 5 — Assemble the Armor: Fit the chilled dough into a nine-inch metal pie plate, letting the excess drape over the edge. Sprinkle the vanilla wafer crumbs evenly over the bottom; they should disappear like beach sand under gentle shaking. Don't press them in—just let them float there like a protective magic carpet. Trim the overhang to about an inch, then roll it under itself to create a chunky rope that sits on the rim. Crimp however you like—fork tines for classic, finger pinches for rustic, or leave it rough for that "I woke up like this" vibe.
- Step 6 — Build the Filling: Drain the peach slices (save two tablespoons of the juice for later) and toss them in a bowl with the reduced syrup, brown sugar, cardamom, and bourbon. The mixture will look like sunset in a cup—glossy, amber, and slightly boozy. Let it macerate for five minutes so the peaches can absorb some of the caramel. If you taste it now, I dare you to stop at one spoonful. Seriously, I once lost half the batch to "quality control."
- Step 7 — Fill and Crown: Pile the peaches into the crust, mounding them slightly in the center. Drizzle any remaining syrup over the top; it'll bubble into a jammy glaze. Roll out the second piece of dough for a lattice or full top—your call. If you go full coverage, cut a few vents shaped like little peach emojis because we're adorable like that. Brush the surface with the egg yolk wash, then sprinkle with coarse sugar for sparkle and crunch. The unbaked pie should look like it belongs on a magazine cover already.
- Step 8 — Bake to Brilliance: Park the pie on the lowest oven rack and bake at 400°F for 20 minutes—this jump-starts the bottom crust. Without opening the door, reduce the temperature to 375°F and continue baking another 25 to 30 minutes. When done, the crust will be deep mahogany and the filling will burble through the vents like slow lava. If the edges brown too quickly, tent them with foil, but don't baby it too much; color equals flavor. The sizzle when hot syrup hits the pan? Absolute perfection.
- Step 9 — The Waiting Game: Here's where discipline enters the chat. Let the pie cool on a wire rack for at least two hours. Yes, two. The filling needs time to set so you get those Instagram-worthy slices instead of a fruity landslide. Use this time to clean the kitchen, practice your humble "oh, this old thing?" face, or just hover nearby inhaling peach-scented air like a dessert vampire.
That's it—you did it. But hold on, I've got a few more tricks that'll take this to another level...
Insider Tricks for Flawless Results
The Temperature Rule Nobody Follows
Most home bakers obsess over oven temps but ignore ingredient temps. For maximum flakiness, every fat molecule needs to stay cold until it hits the hot oven. That means freezing your pie plate for ten minutes before filling, chilling the flour if your kitchen is above 75°F, and even popping the assembled pie in the freezer for fifteen while the oven preheats. I learned this the hard way during a July heatwave when my crust melted into sad paste before it could rise. Now my freezer looks like pie plate Tetris, and the results are worth every awkward shuffle.
Why Your Nose Knows Best
Don't trust the timer blindly—your nose is the most accurate doneness indicator. When the peaches are perfectly roasted, they'll sing a caramel aria that drifts through the house like a dinner bell. If you smell fruit and butterscotch, you're golden. If you smell toast, you're thirty seconds from burnt. Set a second timer for the smell check, then hover like a helicopter parent. Friends swear I have pie radar, but really I just follow the scent trail like a bloodhound in a bakery.
The 5-Minute Rest That Changes Everything
After mixing the filling, let it sit for five minutes while you fuss with the crust. This brief spa moment allows the sugar to draw out just enough peach juice to create a glossy sauce, but not so much that it turns watery. A friend tried skipping this step once—let's just say it didn't end well. Her filling slid out like a syrupy avalanche and pooled into a sad moat around the slice. We still ate it with spoons over ice cream, but the texture was more soup than pie.
Crimp Like You Mean It
A tight crimp isn't just pretty—it's functional armor. Loose edges relax in the oven heat and slump into the filling, creating a raw-doughed disaster. Pinch firmly, then give the rim a quarter-turn twist so it stands tall like a tiny pastry fence. If you're nervous, practice on a scrap piece of dough first. My first attempts looked like a toddler's play-dough snake, but even rustic crimps taste like heaven.
The Freezer Finish
Once cooled, park the pie in the freezer for 20 minutes before slicing. This firms the filling just enough to yield razor-sharp wedges that hold their shape on the plate. Room-temperature pie tastes dreamy but photographs like a lava lamp. If you're serving to company, slice it cold then let each piece warm for five minutes—best of both worlds.
Creative Twists and Variations
This recipe is a playground. Here are some of my favorite ways to switch things up:
Bourbon-Pecan Peach Pie
Swap the cardamom for cinnamon and fold in a cup of toasted pecans with the peaches. The nuts roast in the syrup, turning into candied nuggets that taste like pralines. Drizzle the cooled pie with a quick glaze of powdered sugar, bourbon, and cream—thin enough to drip artistically down the sides. Serve this version at Thanksgiving and watch the pumpkin pie get jealous.
Spicy Mango-Peach Pie
Replace half the peaches with canned mango in syrup, then add a pinch of cayenne and a squeeze of lime to the filling. The sweet-heat combo is addictive, and the tropical perfume transports you straight to beach vacation mode. Top with toasted coconut flakes for extra island vibes. I dare you to taste this and not go back for seconds.
Almond Cream Peach Galette
Roll the dough into a rustic oval, spread with a thin layer of almond frangipane, then pile the peach filling in the center. Fold the edges over like a casual pizza and bake free-form. The frangipane soaks up extra juice and adds marzipan richness. Slice into hand-held wedges for picnics—no plate required, just napkins and zero shame.
Peach-Rose Hand Pies
Cut the dough into 4-inch circles, spoon a tablespoon of filling in the center, fold into half-moons, and crimp with a fork. Brush with wash, sprinkle with rose sugar (sugar blitzed with dried rose petals), bake 18 minutes. They're like edible love letters—portable, pretty, and dangerously poppable. I'll be honest—I ate half the batch before anyone else got to try it.
Savory-Cheese Breakfast Pie
Cut the sugar in half, swap bourbon for orange juice, and fold in ¾ cup of crumbled goat cheese with the peaches. The tang plays off the sweet fruit like a culinary rom-com. Serve slightly warm for brunch alongside strong coffee and watch guests swoon. It's like cheesecake and pie had a sophisticated baby.
Salted Caramel Peach Crumble
Omit the top crust entirely and blanket the filling with a streusel of brown sugar, oats, butter, and a hefty pinch of flaky salt. The salt amplifies the caramel notes and keeps the sweetness in check. Bake until the crumble is deeply bronzed and crunchy. Serve with cold heavy cream poured over the top—old-school diner style.
Storing and Bringing It Back to Life
Fridge Storage
Once completely cool, drape a loose tent of foil over the pie and refrigerate for up to four days. Don't wrap it tightly or the crust will weep and turn soggy. If you notice the edges softening, pop the pie into a 350°F oven for eight minutes to re-crisp before serving. The filling sets even firmer in the fridge, so slices hold like champs.
Freezer Friendly
Wrap the cooled pie (whole or sliced) in a double layer of plastic wrap, then foil, and freeze for up to two months. Thaw overnight in the fridge, then refresh in a 325°F oven for 15 minutes. The crust regains most of its snap, and the filling tastes almost freshly baked. Pro move: freeze individual slices on a tray first, then bag them—instant single-serve dessert emergencies.
Best Reheating Method
Add a tiny splash of water to a skillet, nestle in a cold slice, cover with a lid, and warm over low heat for five minutes. The steam revives the crust without drying it out, and the filling returns to glossy glory. Microwave works in a pinch, but it turns the crust leathery—acceptable only for midnight desperation. Picture yourself pulling this out of the oven, the whole kitchen smelling incredible, and suddenly that leftover slice feels like a brand-new experience.